Steamed Garlic Chive Dumplings (Kanom Gui Chai)
As an Amazon Associate, I earn from qualifying purchases. Read the full disclosure here .
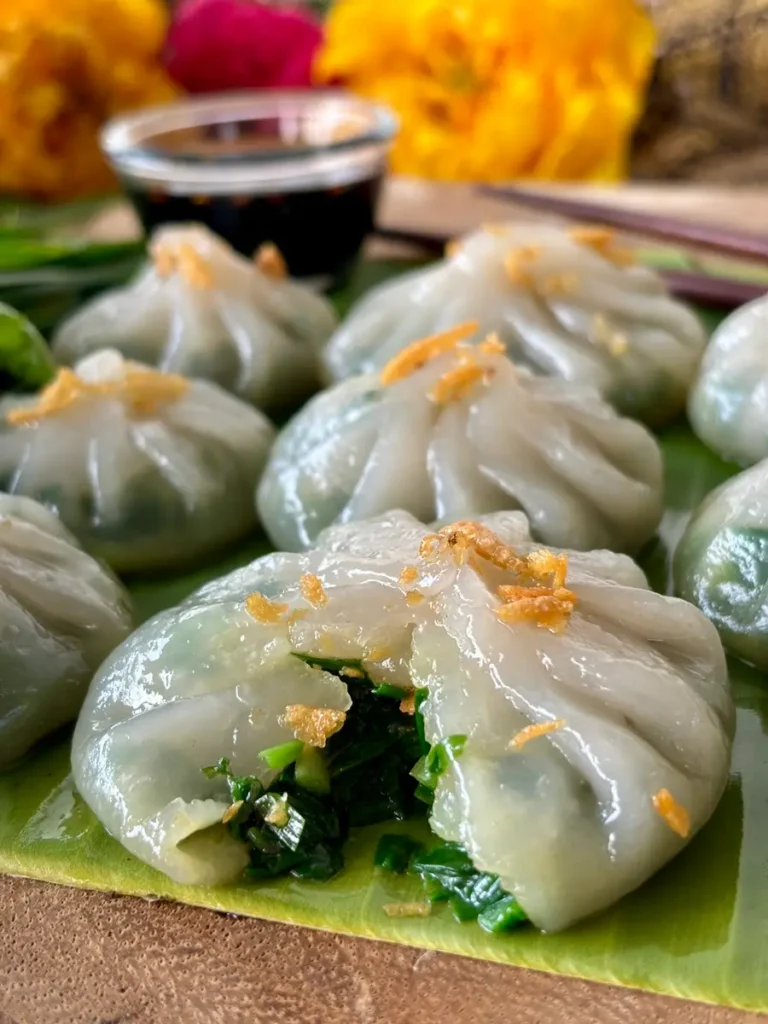
These steamed garlic chive dumplings can’t be beaten – they’re downright delicious, fun to make, and freeze like a dream. With this kanom gui chai recipe and my special homemade dipping sauce, you’re ready to make some irresistible snacks that your family will love.

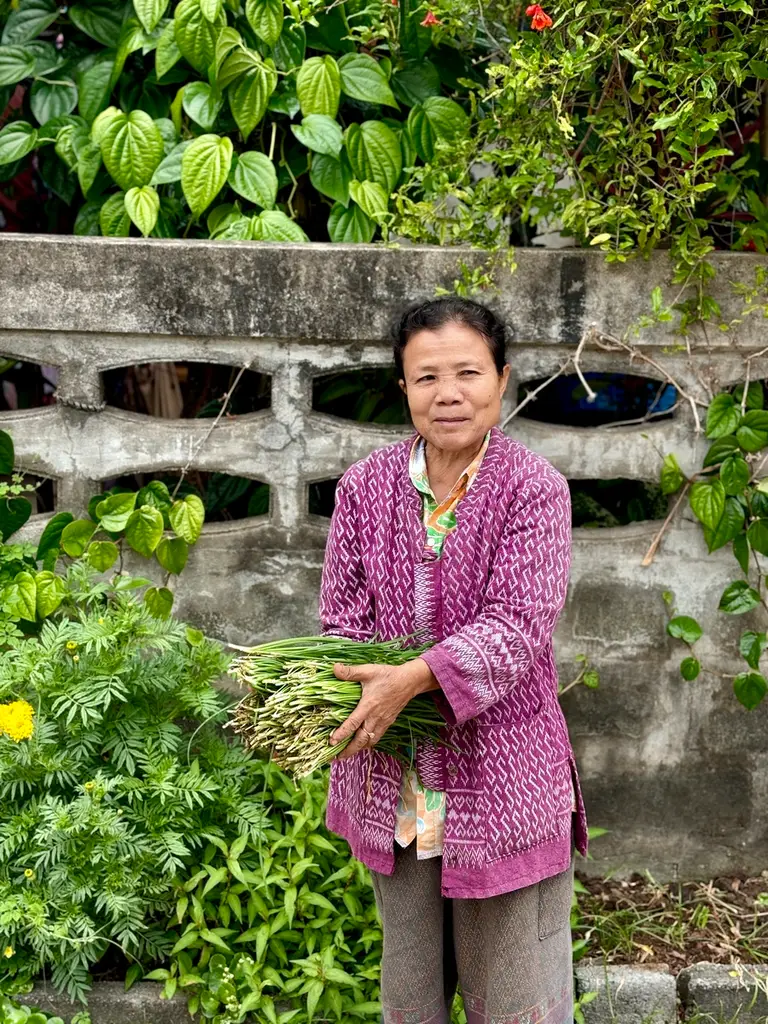
This week was fantastic. My grandmother’s neighbor surprised me with a bunch of fresh garlic chives!
It was the perfect time to make my authentic chicken pad Thai. And with the Lunar New Year right around the corner, I got inspired to create these Chinese-style dim sum chive dumplings.
I also made some Thai chive pancakes, they’re just perfect for making ahead of time. Three delicious garlic chive recipes for you!
What are garlic chive dumplings
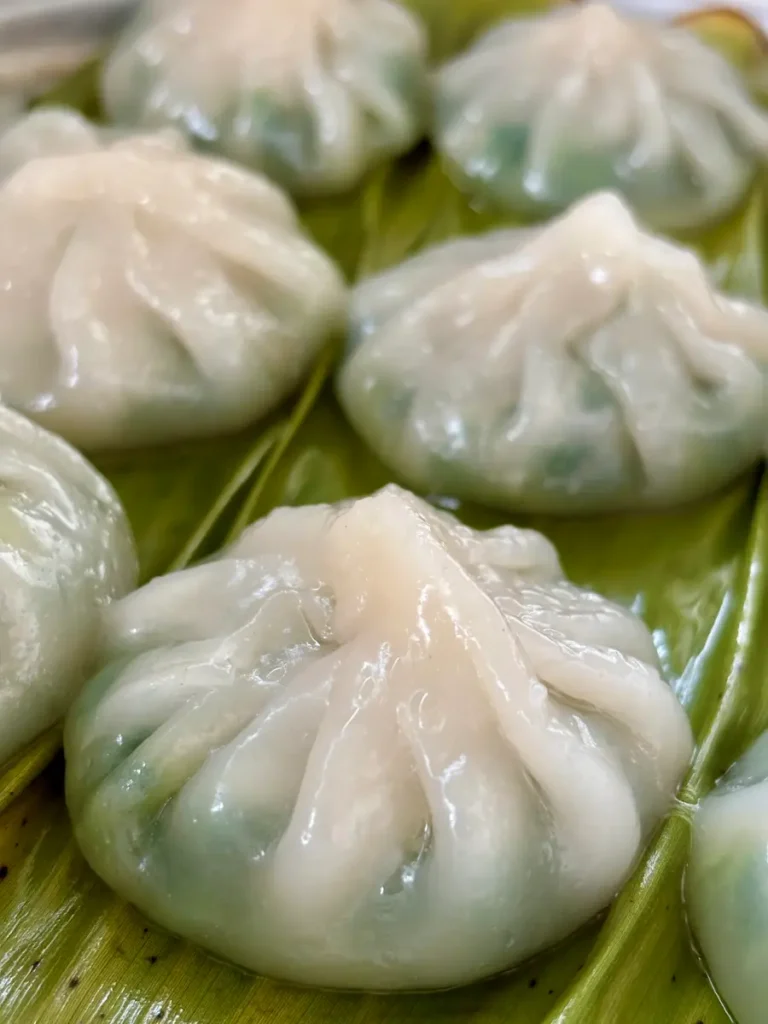
Garlic chive dumplings, or kanom gui chai in Thai, are savory steamed dim sum. They’re a mix of tapioca and rice flour, filled with garlic chives. It’s a Chinese-inspired snack with a tender and chewy texture and is usually served with a dipping sauce.
Kanom means snack or dessert, and gui chai translates to garlic chives in English.
Steamed garlic chive dumplings
Making these dumplings is just like baking a cake – it’s fun and absolutely worth it.
We start by combining tapioca and rice flour to form a smooth, elastic dough.

The garlic chives are finely chopped and tossed with some seasonings. It’s a simple dumpling filling, but it adds so much flavor.
The next part is the most fun – filling and shaping the dumplings. It’s the perfect family activity. Take a small portion of dough, spoon in the chive mixture, and shape it.
After steaming, just pair them with the wonton dipping sauce included in this recipe, and they’ll be irresistible. I’ve got more sauce options coming up after the instructions – sweet, spicy, or anything you love.
It’s a bit of prep, but it leads to loads of deliciousness. Share them, or keep them all to yourself!
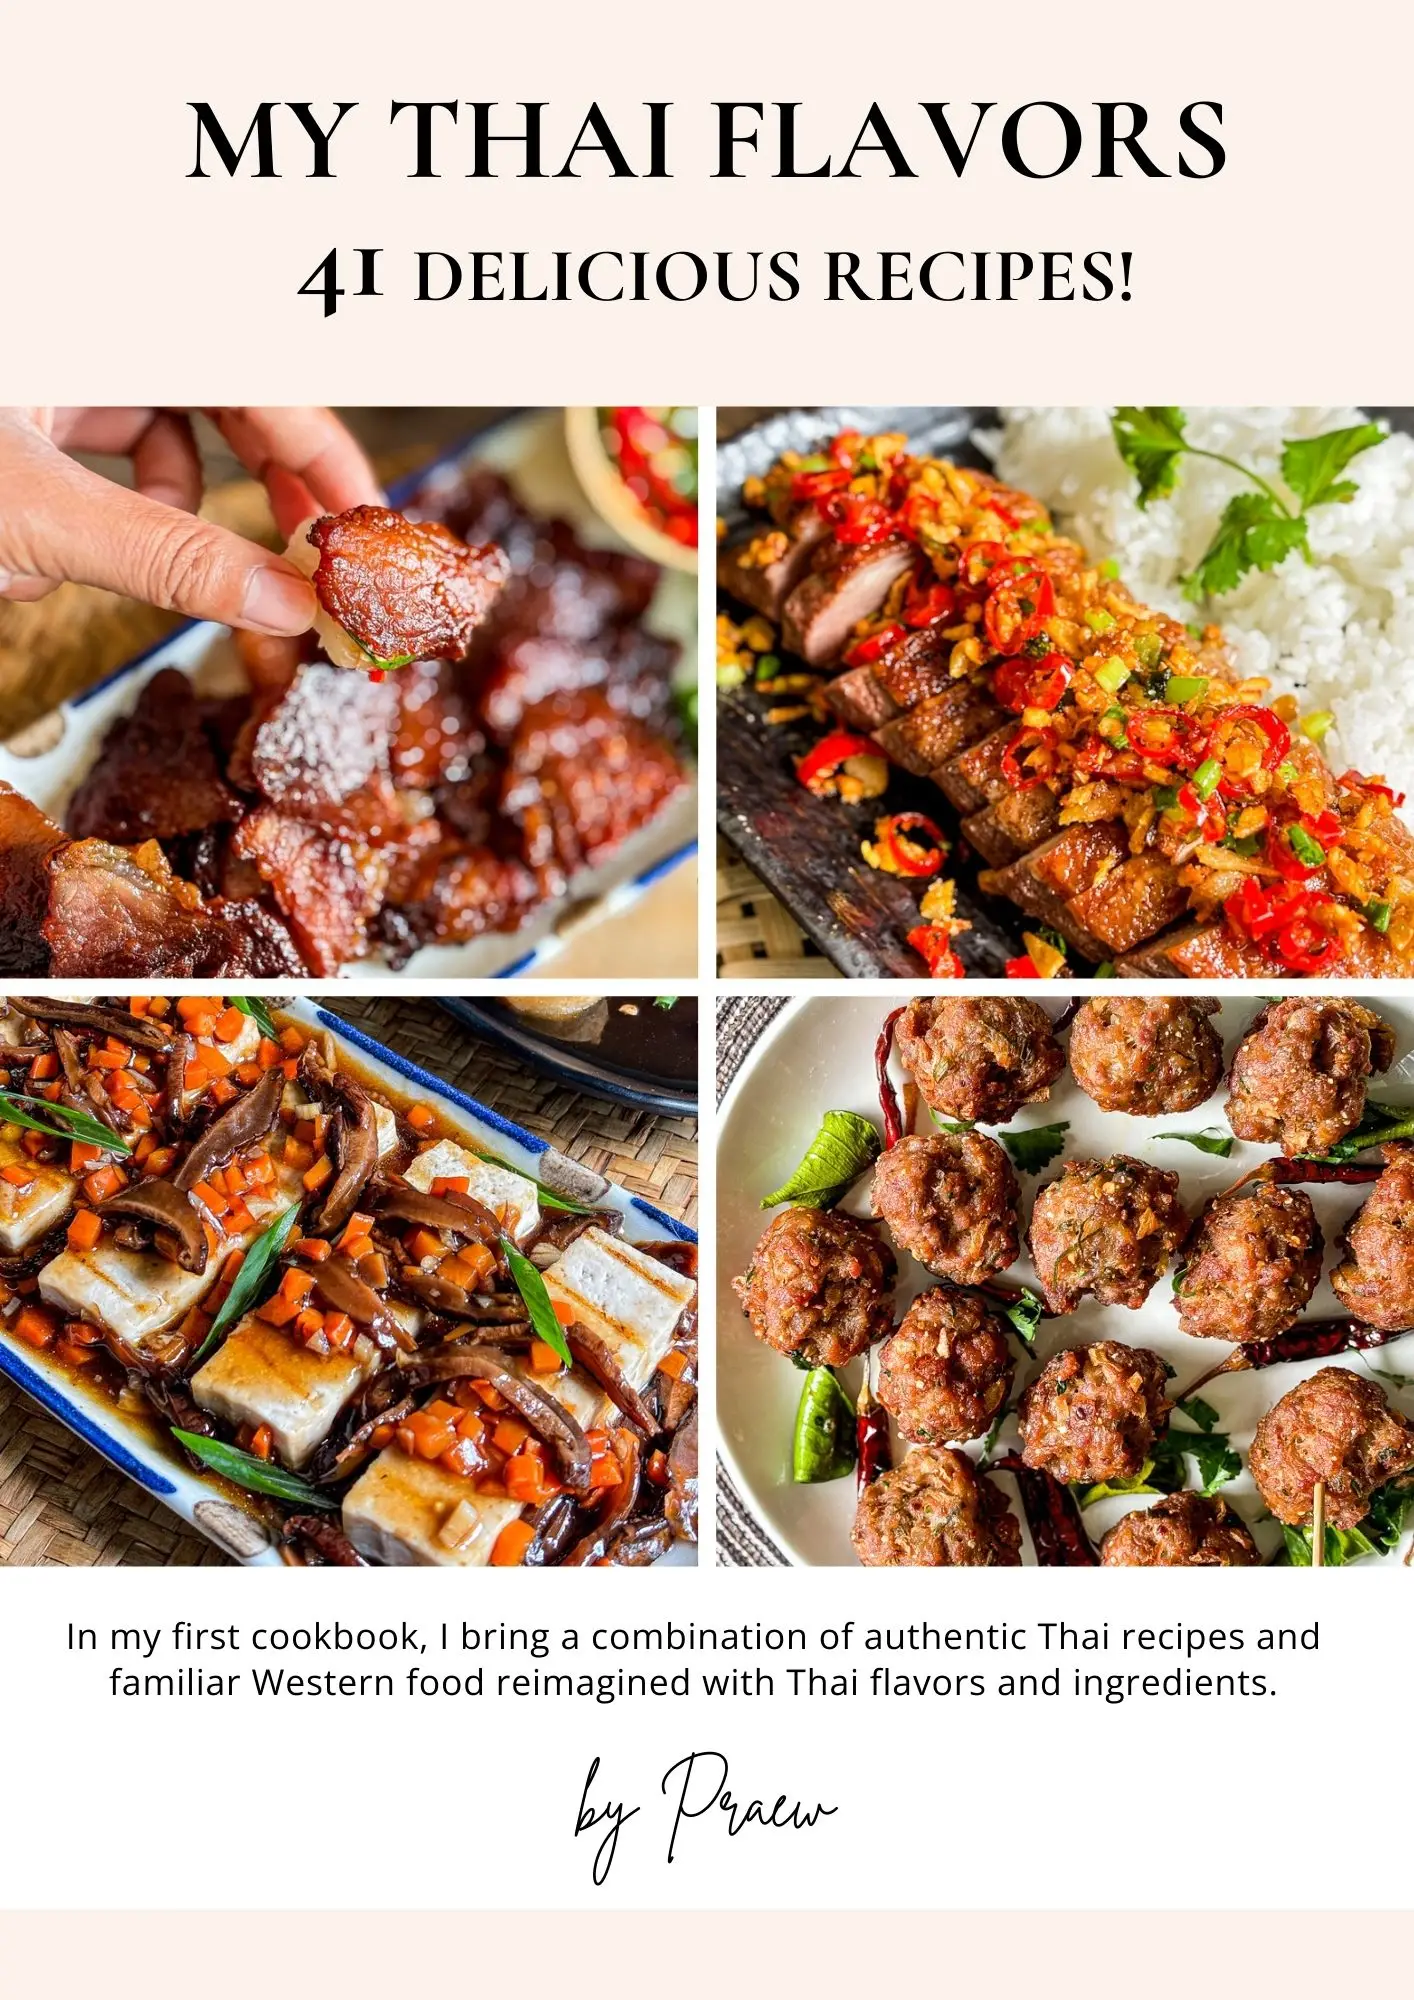
Learn Thai cooking step by step
My cookbook is a combination of authentic Thai recipes and Western dishes cooked with Thai flavors and ingredients. It’s a great starting point if you’re new to Thai cooking or want to cook it more often.
Ingredients
Ingredients can be sourced at Asian grocery stores and Asian markets.
The exact measurements are in the recipe card at the end of this post.
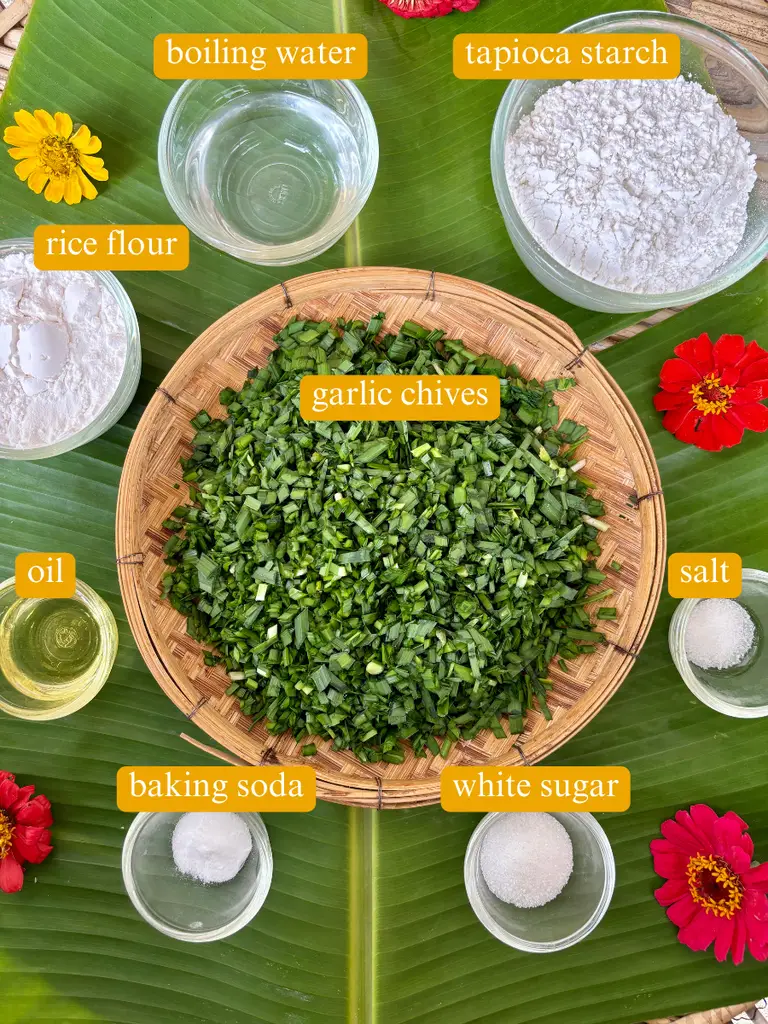
Chive dumplings
- Garlic chives – Garlic chives are fresh with a slightly garlicky flavor, making the steamed dumplings incredibly aromatic and tasty. Learn more about garlic chives.
- Tapioca starch – Tapioca flour adds a chewy texture to the dumpling wrappers, it’s gluten-free and can be found at Asian grocery stores or at larger supermarkets.
- Baking soda – Baking soda slightly softens the garlic chives and ensures they retain their green color during steaming.
- White sugar – A bit of sweetness is essential for balancing the savory flavors in the filling.
- Rice flour – Rice flour creates a translucent and tender dough for wrapping the dumplings.
- Salt – Salt enhances the overall flavors, ensuring the dumplings are well-seasoned and delicious.
- Oil – You’ll need oil for tossing with the garlic chives, for mixing in the dough, and for brushing on the shaped dumplings.
This recipe is a traditional one passed down from my grandmother, making it an authentic ‘boraan’ or ancient dish. The only change I made is the addition of baking soda.
Dipping sauce

- Dark soy sauce – Dark soy gives the sauce a deep, amber color and adds a hint of sweetness.
- White vinegar – White vinegar adds a tangy note. Adding just the right amount is important to not overwhelm the other flavors.
- White sugar – Adds a necessary sweetness for balancing the spicy and tangy flavors.
- Chilies – I used Thai Jinda chilies. Feel free to add more or less to your taste.
- Water – Blends all the ingredients into a dippable sauce.
How to make kanom gui chai
sauce
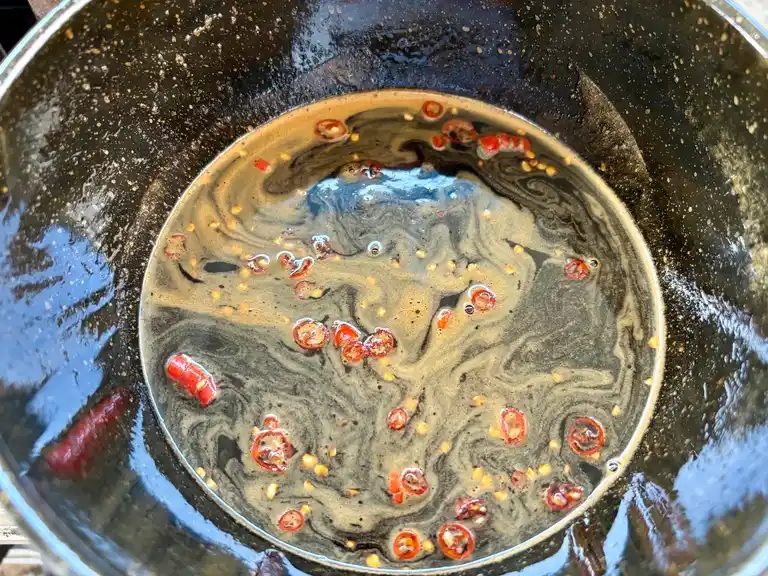
Step 1: In a small saucepan over medium heat, blend white sugar, dark soy sauce, white vinegar, and water. Let it simmer for 3 minutes, stirring well. Add chopped chilies and stir for another minute.
Kanom gui chai
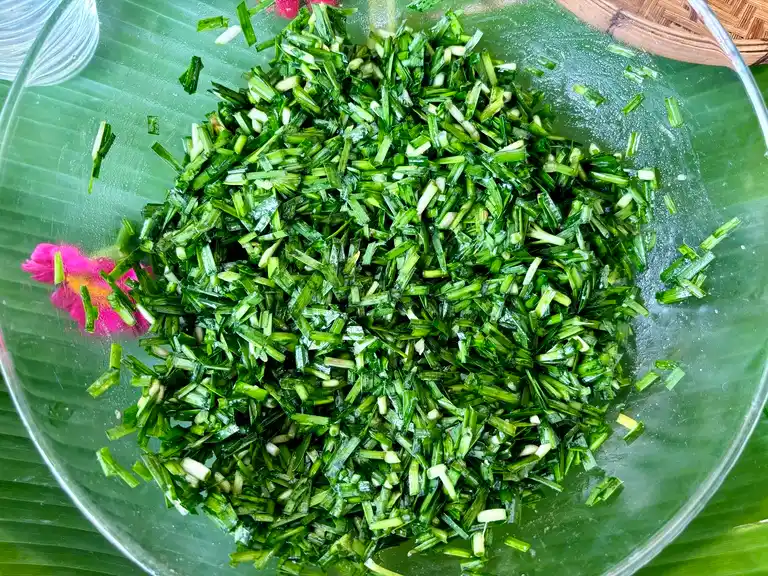
Step 2: Roughly chop the garlic chives. In a large mixing bowl, combine the chives with salt, sugar, oil, and baking soda.

Step 3: Knead the mixture by hand to draw out the chives’ moisture. Once done, transfer them to another bowl and set aside.
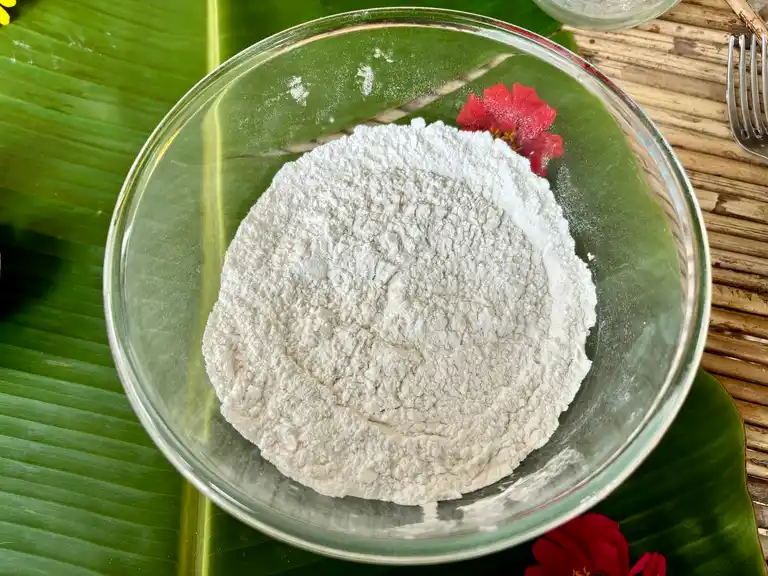
Step 4: In a separate bowl, whisk together tapioca flour and rice flour.

Step 5: Slowly pour in boiling hot water(!), stirring constantly. Mix until the dough cools slightly and you can knead by hand.
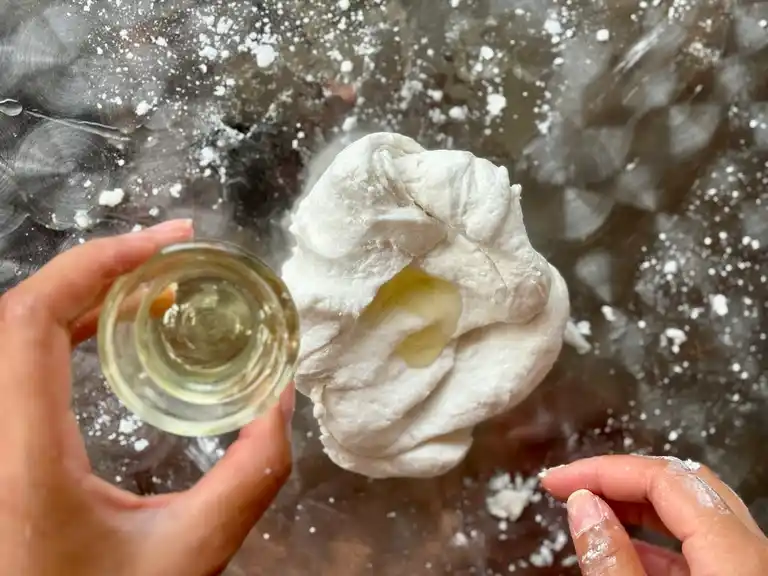
Step 6: Transfer the dough to a flat surface. Knead continuously, gradually incorporating oil into the dough as you go.
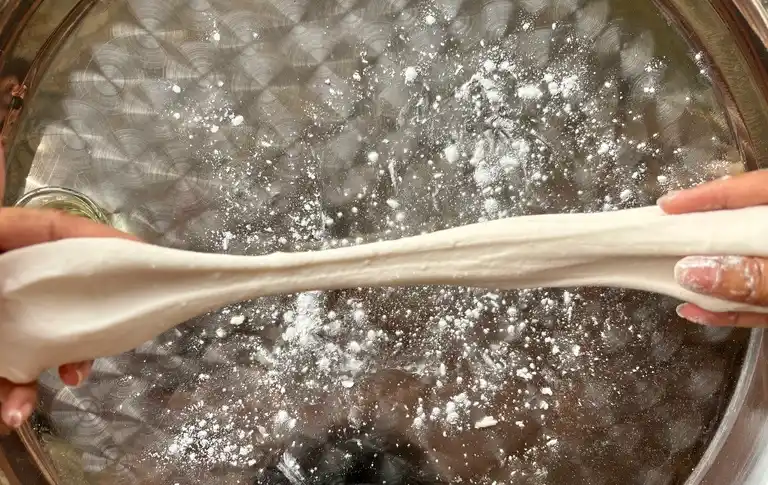
Step 7: Knead until the dough is elastic enough to form into a rope without tearing.
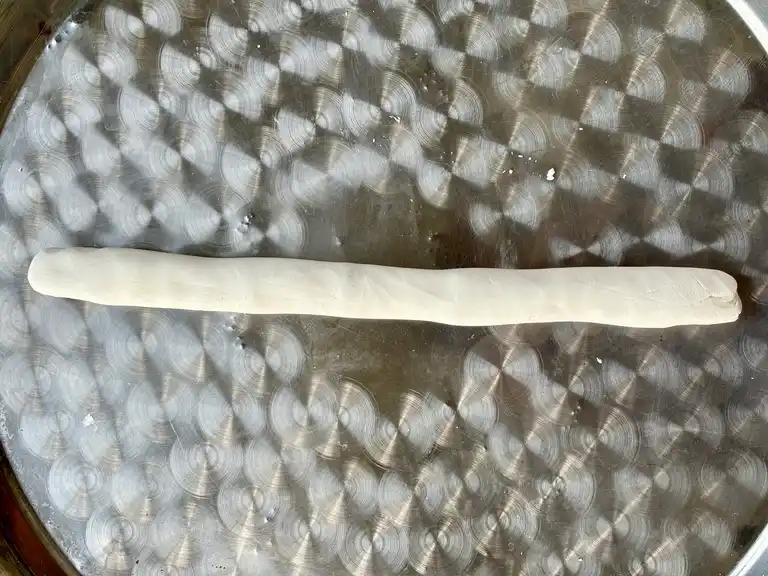
Step 8: Shape the dough into a long, even rope.
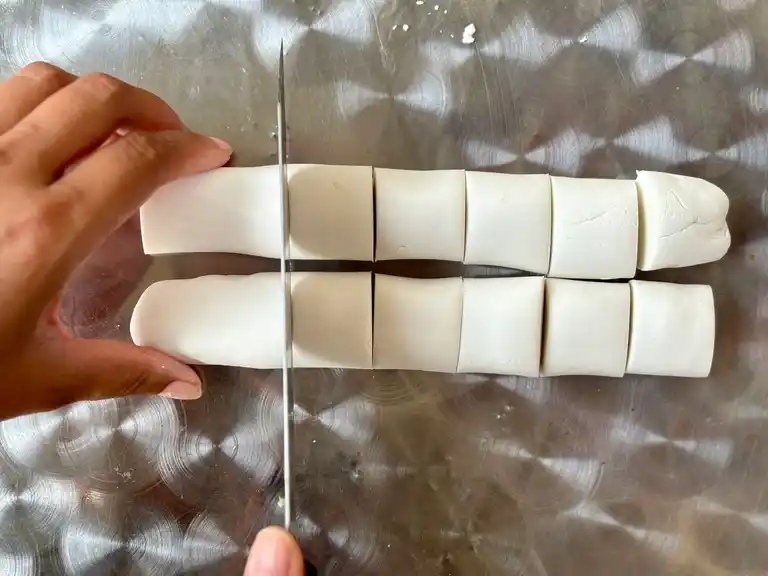
Step 9: Cut the rope into 16 equal pieces.
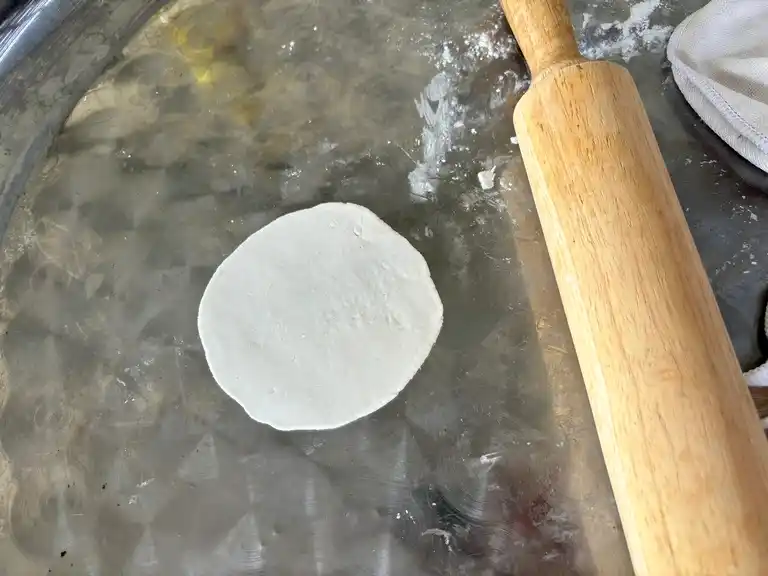
Step 10: Keep the pieces under a damp cloth to prevent drying. Roll out one piece at a time into a flat, round wrapper and fill immediately.
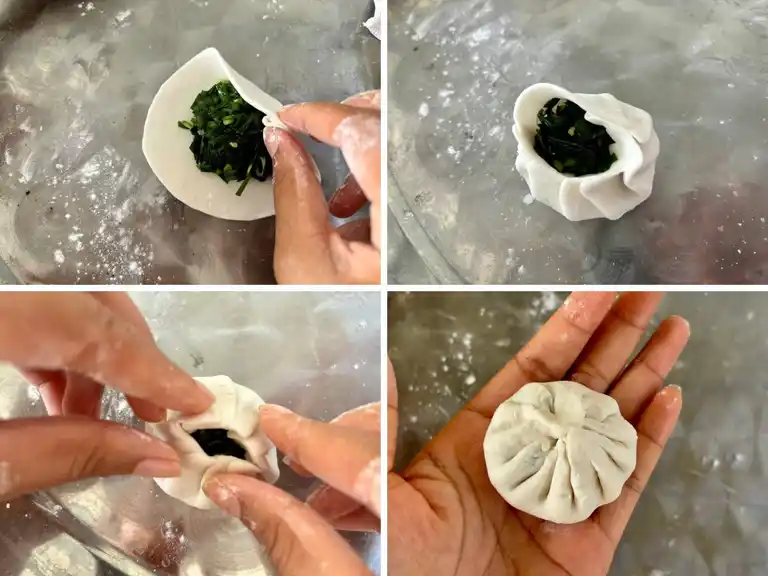
Step 11: Place 2 heaped teaspoons of the chive filling in the center of your wrapper. Gently lift the edges of the wrapper and start pleating, working your way around the filling. Pinch the pleats firmly to seal the dumpling, ensuring the filling is snugly enclosed. Finish by closing the dumpling at the top and then keep your finished dumpling under the damp towel.
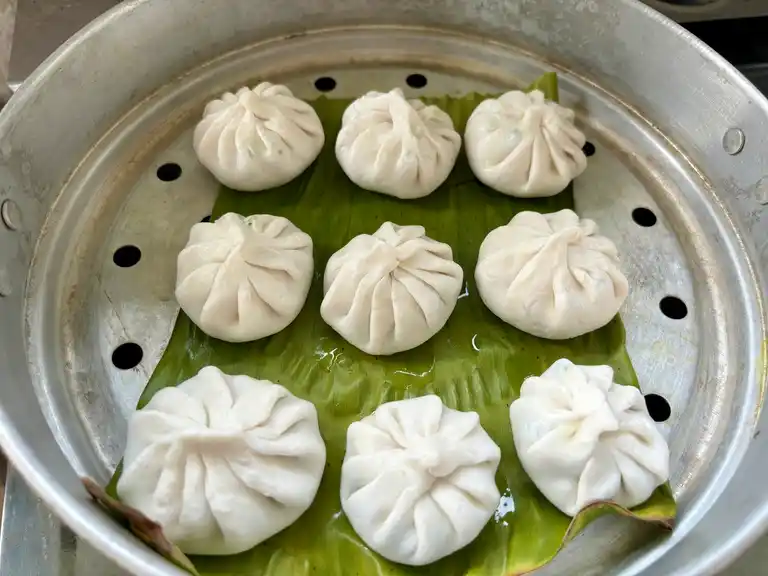
Step 12: Arrange the dumplings on banana leaves or parchment in a steamer, spaced apart. Brush with remaining oil and steam over medium heat for 8 minutes.
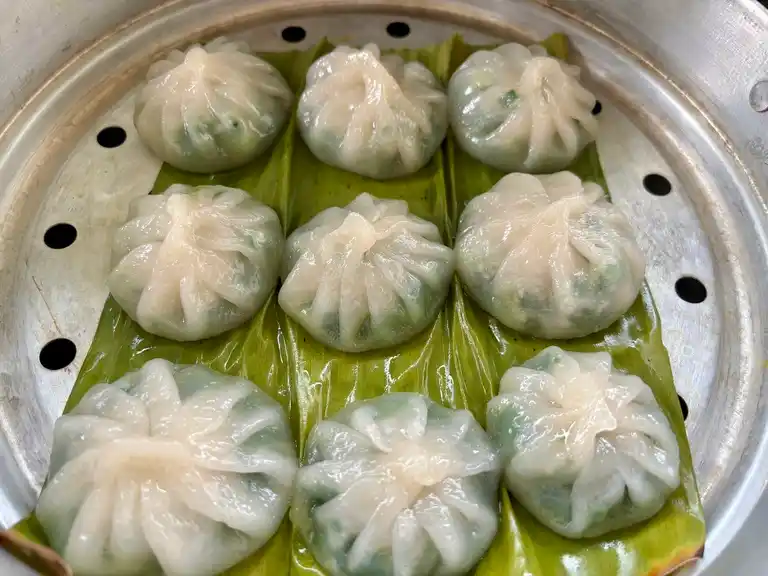
Step 13: After steaming, brush the dumplings with another layer of oil. Steam for an additional 2 minutes. Serve hot, topped with crispy fried garlic if desired. Enjoy!
Kitchenware
- 3 large bowls (2 for prepping garlic chives and 1 for the dough)
- Small saucepan with spoon for making the sauce
- Cutting board and a sharp knife
- Steamer and parchment paper
- Measuring spoons and cups
- Flat surface and rolling pin
Thai Steamed dumpling recipe tips
Sealing dumplings: Ensure your dumplings are sealed tightly to prevent them from opening during steaming.
Steam in batches: Avoid overcrowding your steamer, as this can lead to uneven cooking.
Fried garlic: While the dumplings are steaming, brush them with garlic oil instead of regular oil. After they are steamed, garnish each dumpling with crispy fried garlic.
Vegetables: Feel free to add some veggies, like finely chopped spinach, carrots, cabbage, or mushrooms.
Proteins: Steamed dumplings are versatile – you can add ground shrimp, pork, chicken, and even tofu to keep it vegetarian.
Make sure to finely chop anything you add to your garlic chive dumplings!
Thai Chive dumpling dipping sauces
These dumplings pair perfectly with the dipping sauce included in this recipe! If you’re having a party, it’s always good to offer multiple sauces – try Thai sweet chili sauce and Thai hot sauce, a homemade sriracha.
Make ahead and storage
Make ahead: Dumplings freeze wonderfully. Prepare a big batch, place them on a baking sheet without touching, and freeze for up to 3 months. Once solid, move to a freezer bag. Steam directly from frozen, just add a few extra minutes to the cook time.
Storage: Cooked dumplings can be stored in the refrigerator for up to 2 days. Let them cool down to room temperature and keep them in an airtight container or sealed in plastic wrap in your fridge. To reheat, simply steam them again for about 5 minutes, or until they’re warmed through.
Frequently asked questions
Are chive dumplings vegetarian?
Chive dumplings can be vegetarian, but some version might include meat like pork.
Are these steamed dumplings gluten-free?
Yes. Stick to the mix of tapioca and rice flour to keep them gluten-free.
Authentic Thai appetizer recipes
- Thai tapioca dumplings
- Pork and shrimp wonton
- Crispy rice paper dumplings
- Thai fried wonton
- Pork gyoza recipe
Loved reading this steamed garlic chive dumplings recipe? Please make my day by dropping a star rating and/or a comment below! Follow me on Facebook, Instagram, and Pinterest.
Steamed Garlic Chive Dumplings (Kanom Gui Chai)

Ingredients
GARLIC CHIVE DUMPLINGS
- 3 1/2 cups garlic chives, roughly chopped
- 1 teaspoon salt
- 2 teaspoons white sugar
- 4 tablespoons oil
- 1 teaspoon baking soda
- 1/2 cup rice flour
- 1 cup tapioca starch
- 2/3 cup boiling water
DIPPING SAUCE
- 2 tablespoons white sugar
- 1 1/2 tablespoon dark soy sauce
- 3 tablespoons white vinegar
- 2 tablespoons water
- 1 chilies, finely chopped, add to taste
Instructions
SAUCE
- In a small saucepan over medium heat, blend white sugar, dark soy sauce, white vinegar, and water. Let it simmer for 3 minutes, stirring well. Add chopped chilies and stir for another minute.
DUMPLINGS
- Roughly chop the garlic chives. In a large mixing bowl, combine the chives with salt, sugar, oil, and baking soda.
- Knead the mixture by hand to draw out the chives’ moisture. Once done, transfer them to another bowl and set aside.
- In a separate bowl, whisk together tapioca flour and rice flour.
- Slowly pour in boiling hot water(!), stirring constantly. Mix until the dough cools slightly and you can knead by hand.
- Transfer the dough to a flat surface. Knead continuously, gradually incorporating oil into the dough as you go.
- Knead until the dough is elastic enough to form into a rope without tearing.
- Shape the dough into a long, even rope.
- Cut the rope into 16 equal pieces.
- Keep the pieces under a damp cloth to prevent drying. Roll out one piece at a time into a flat, round wrapper and fill immediately.
- Place 2 heaped teaspoons of the chive filling in the center of your wrapper. Gently lift the edges of the wrapper and start pleating, working your way around the filling. Pinch the pleats firmly to seal the dumpling, ensuring the filling is snugly enclosed. Finish by closing the dumpling at the top and then keep your finished dumpling under the damp towel.
- Arrange the dumplings on banana leaves or parchment in a steamer, spaced apart. Brush with remaining oil and steam over medium heat for 8 minutes.
- After steaming, brush the dumplings with another layer of oil. Steam for an additional 2 minutes. Serve hot, topped with crispy fried garlic if desired. Enjoy!
Notes
- Use the nutrition card in this recipe as a guideline.
- Feel free to customize these - add vegetables and ground meat to your liking.
i like it delicious
thanks to you
Thank you, Perly!
Hello! Thank you for this delicious recipe!! My mom and I loved it. One note for people planning to make this in the future–please make sure your water is boiling hot when you add it to the flour!
The first time I made it, I poured my water from my kettle into a glass pyrex, so the water cooled a bit. The dough then was very difficult to work with. It felt too try and did not become elastic no matter how much oil I added. This made filling and folding the dumplings very difficult. 🙁
I decided to try again that same day (since the first batch was delicious even if it wasn’t pretty to look at). The second time, I added the water directly from the kettle and the results were MUCH better! The dough was instantly very elastic and pliable. This made filling and folding the dumplings much easier.
This recipe is going into my regular rotation. Thank you again!
Hey Kat, thank you for such a lovely comment!
I’m glad you tried the recipe another time and had better results with boiling hot water. I even bolded the text for boiling hot water in the instructions for more clarity. Thank you!
This recipe is easy to make and delicious! We will definitely be making this again. Thank you!!
Thank you so much!