Thai Pandan Coconut Jelly Dessert Recipe
As an Amazon Associate, I earn from qualifying purchases. Read the full disclosure here .
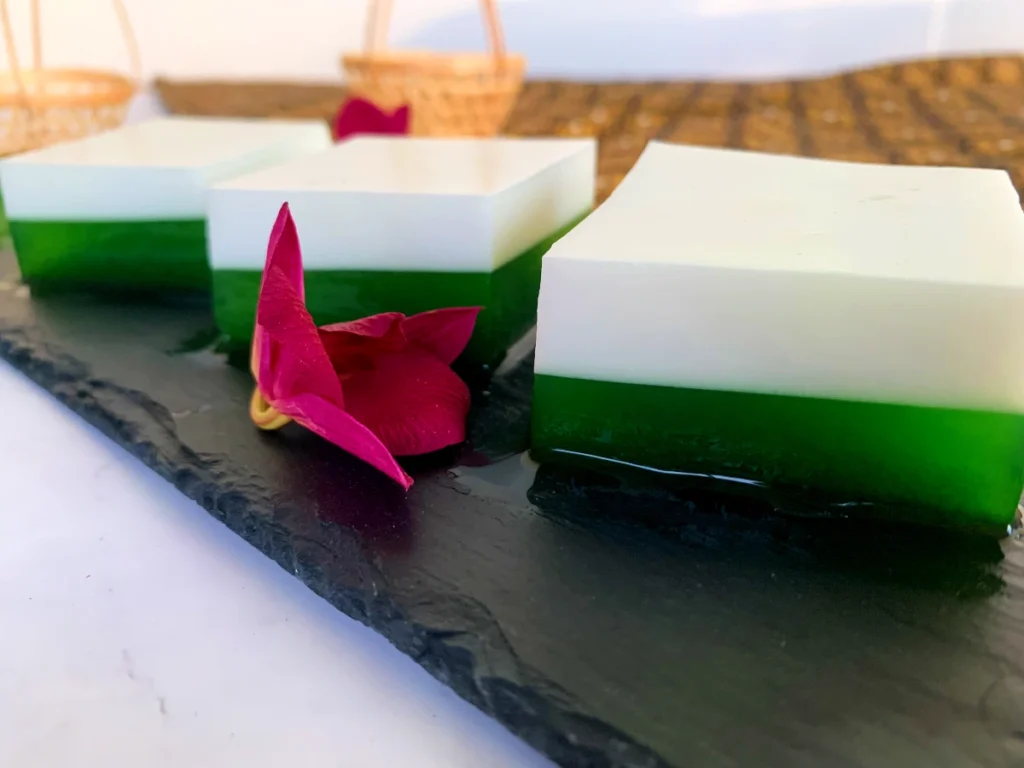
This Thai pandan coconut jelly dessert recipe has two soft, perfectly sweetened layers and a light coconut flavor. It’s vegan, gluten-free, and great for warm summer days.

What is pandan coconut jelly?
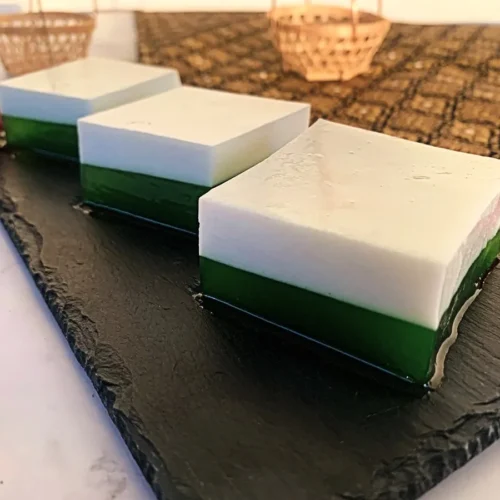
Pandan coconut jelly is a Southeast Asian dessert made with pandan juice, coconut milk, sugar, and agar agar powder. It has a soft, bouncy jelly texture and a lightly sweet, fragrant pandan flavor balanced by creamy coconut. It’s known for its green and white layers and is typically served chilled as a refreshing treat.
The jelly can be made with two layers (pandan and coconut) or with multiple repeating pandan and coconut layers.
- Coconut layer: Coconut milk, sugar, salt, and agar-agar form a creamy, lightly sweet, and salted layer that balances the herbal pandan flavor.
- Pandan layer: Pandan juice, sugar, and agar-agar create a layer with light sweetness, fresh pandan aroma, and a soft texture.

About this recipe
I learned how to make coconut pandan jelly from a young age, as my grandmother sold sweets at the local food market in Thailand.
This recipe uses a simple two-layer method that’s easier than making multiple layers and still gives you the same fragrant pandan creamy coconut flavor. Perfect for home cooks!
What you’ll love about this recipe
Praew ♡
What is agar-agar?
Agar-agar is a plant-based setting agent made from seaweed. It’s flavorless and sets firmer than gelatin, giving jellies, puddings, and custards a stable, bouncy texture.
It’s popular in Asian and vegan desserts because it sets at room temperature and holds its shape well when chilled.
This recipe uses agar agar instead of gelatin. I always use agar-agar for layered desserts like this one because it doesn’t melt easily and stays stable even in the heat in Thailand.
This recipe uses pandan leaves and coconut milk, which you can also use to make my other jelly recipes: khanom chan and coconut jelly cubes with coconut water.
Learn Thai cooking step by step
My cookbook is a combination of authentic Thai recipes and Western dishes cooked with Thai flavors and ingredients. It’s a great starting point if you’re new to Thai cooking or want to cook it more often.

Ingredient notes & substitutes
The ingredients are divided into two sections: one for the green pandan layer and one for the white coconut layer. See the recipe card for exact measurements.
Pandan layer ingredients

- Pandan leaves — Fresh pandan leaves give the best aroma, but frozen pandan works too and is easy to find at Asian grocery stores. Pandan essence can be used in a pinch, though the flavor will be less natural. Learn more about pandan.
- White sugar — Granulated sugar keeps the pandan jelly clear and clean-tasting. Adjust to taste.
- Agar-agar powder — Used instead of gelatin because it sets firmer and keeps the jelly clean and stable, even at room temperature. Get it on Amazon.
- Water — Helps dissolve the agar-agar evenly and creates the soft, bouncy texture in the pandan layer.
Coconut layer ingredients
- Coconut milk — Use full-fat coconut milk for the best flavor and a creamy, smooth coconut layer. I highly recommend the Aroy-D brand.
- Agar-agar powder – Sets the coconut jelly firmly.
- White sugar — Sweetens the coconut layer.
- Salt – The coconut layer is lightly salted, which balances the sweetness and creates a nice contrast with the sweeter pandan layer.
How to make pandan coconut jelly
This dessert is made in two steps. First, cook the pandan jelly layer, pour it into the mold, and let it rest until mostly set. Then prepare the coconut layer and gently pour it on top.
Step 1: Make the pandan layer
1. In a small bowl, mix the agar-agar powder with ½ cup of water and let it sit to hydrate.
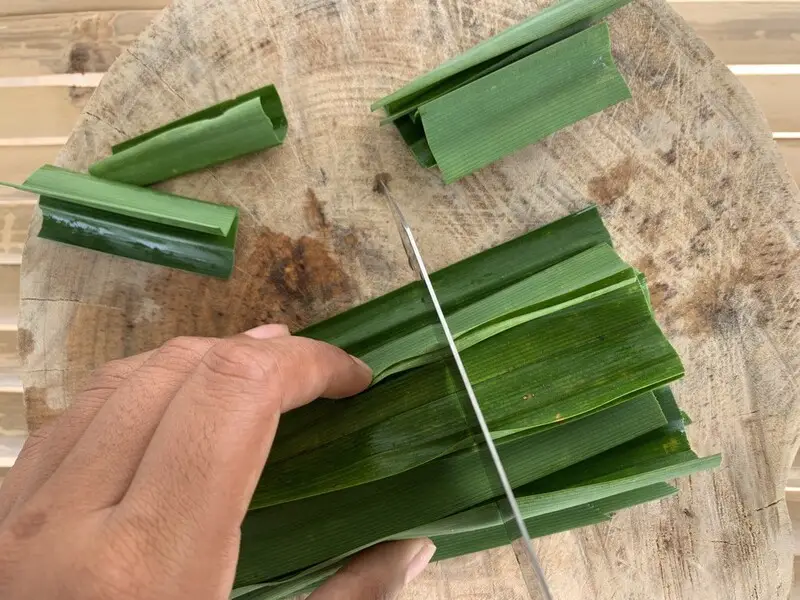
2. Use a sharp knife to cut the pandan leaves into short pieces.
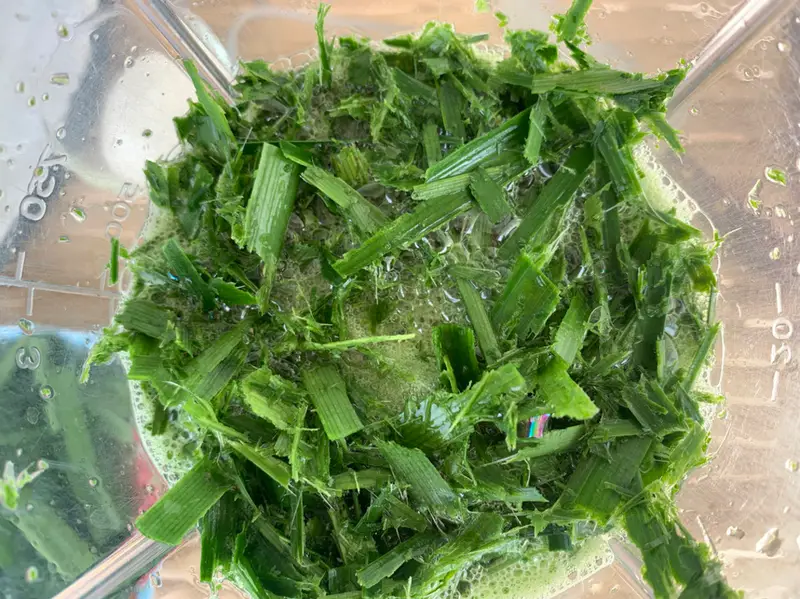
3. Use a blender to blend the pandan leaves with the 3 cups of water until broken down and fragrant.
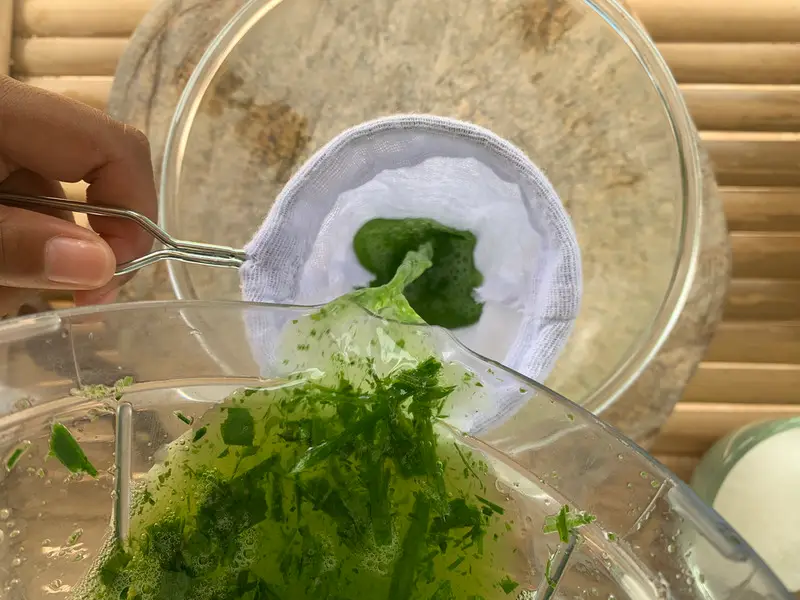
4. Strain the mixture through a fine strainer or cheesecloth to filter the smooth pandan extract, pressing well to get all the liquid.

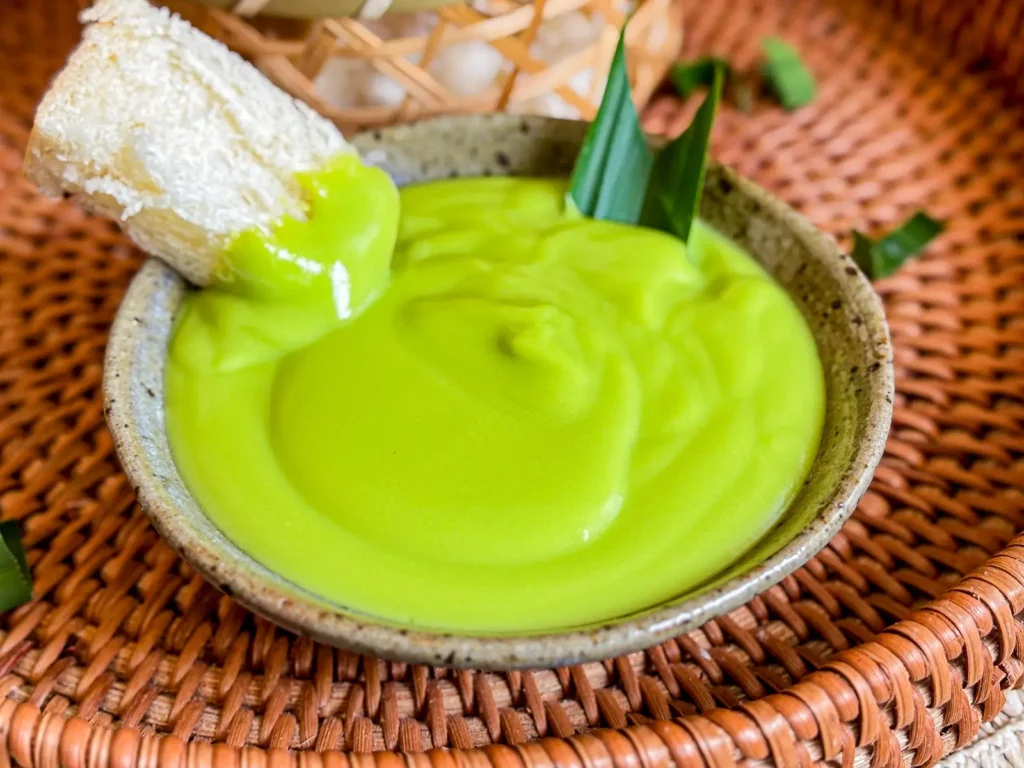
5. Pour the pandan juice into a pot over low to medium heat and bring it to a gentle simmer. Stir the soaked agar-agar once more to loosen it, then add it to the pot.
6. Cook while stirring until the agar-agar is completely dissolved and the liquid looks clear (about 5 minutes). Run a spoon through the mixture. If you see any graininess on the back of the spoon, keep stirring until smooth.
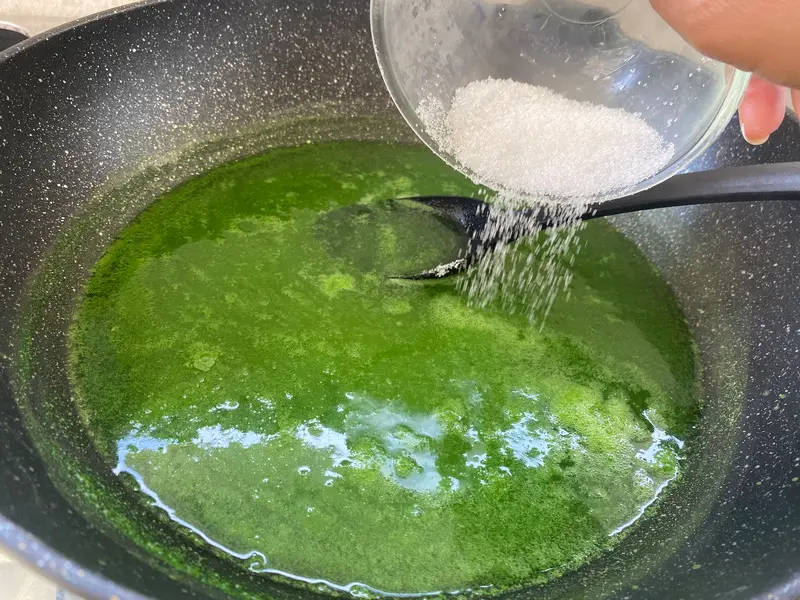
7. Add the sugar and stir until completely dissolved.
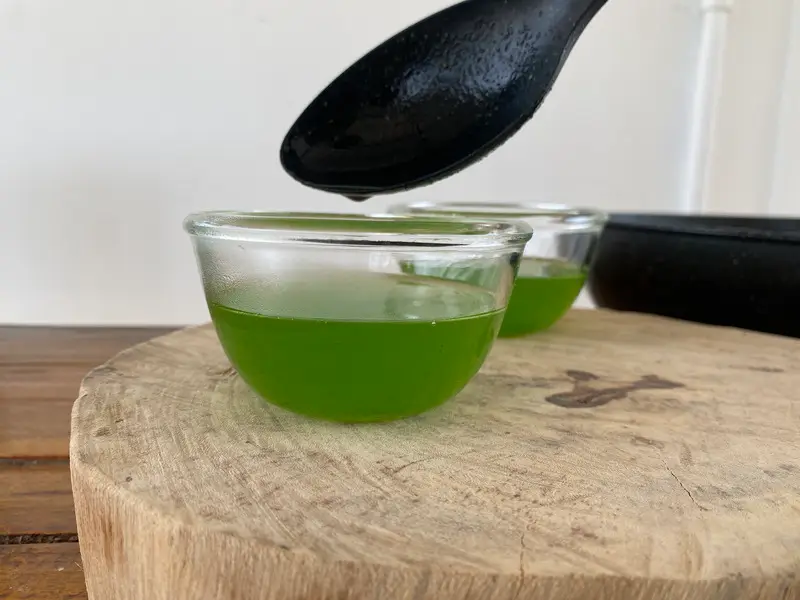
8. Pour the pandan mixture into your mold or cups. Let it set at room temperature until just firm (about 30 minutes) before adding the coconut layer. Meanwhile, prepare the coconut layer.
Step 2: Make the coconut layer
1. In a bowl, mix the agar-agar with the water (the same way as earlier) and let it sit.
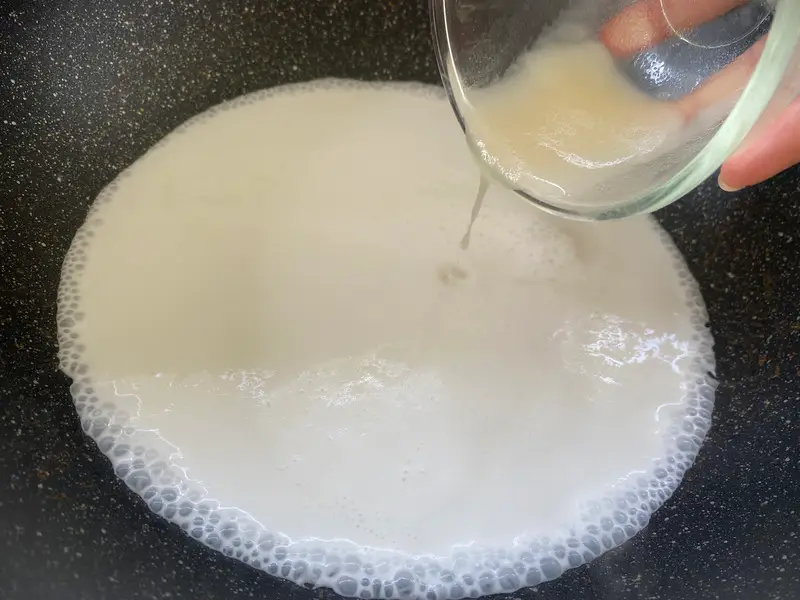
2. Heat the coconut milk in a pan over low heat. When it starts to gently bubble around the edges (don’t let it boil), add the agar-agar mixture. Stir continuously until the agar-agar is fully dissolved and the mixture looks smooth, with no visible grains.

3. Add the sugar and salt and stir until completely dissolved, then remove from the heat.
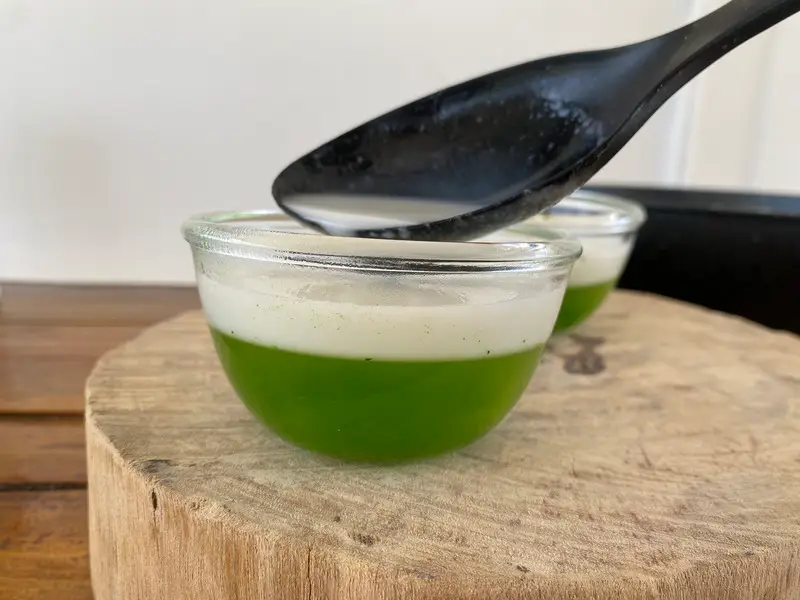
4. Once the pandan layer is just set (it doesn’t need to be completely firm), gently spoon the coconut mixture over the top. Keep the spoon close to the surface to avoid breaking through the pandan layer.
5. Let the jelly rest at room temperature until fully set. Slice into pieces or chill before serving.
Tips for first-time jelly makers
❥ Stir the agar mixture before using. Agar can settle quickly, so give it a quick stir right before adding it to the pot to keep the texture even.
❥ Adjust the green color if needed. Younger pandan leaves produce a lighter green, while mature leaves give a deeper color. For a stronger color or aroma, add a small drop of pandan essence after blending.
❥ Let the pandan layer set until just firm. If it’s too soft, the coconut layer sinks. If it’s fully set, the layers won’t stick. Pour the coconut layer when the surface feels firm but not fully cold.
❥ Pour gently over the first layer. Pour the second layer slowly and close to the surface so it doesn’t disturb or break through the set pandan layer.
❥ Measure each layer for an even finish. Using a kitchen scale to portion the liquid helps keep the layers even.

Thai Pandan Coconut Jelly Dessert
Equipment
- Measuring cups & spoons
- Small bowls (To soak the agar)
- blender (To blend the pandan leaves with water into a fragrant juice)
- Fine strainer or cheesecloth (For straining out the pandan fibers)
- Medium pot (For cooking both the pandan and coconut layers)
- Heatproof spatula or spoon (For stirring)
- Molds or small cups (For setting the jelly layers evenly)
- Spoon or small ladle (For gently pouring the coconut layer without breaking the pandan layer)
Ingredients
For the pandan layer
- 1 tbsp agar-agar powder
- 8 pandan leaves
- 3½ cups water, divided into 3 cups (750 ml) for blending pandan and ½ cup (150 ml) for soaking agar-agar
- ½ cup white sugar
For the coconut layer
- 1 tbsp agar-agar powder
- ½ cup water
- 2 cups coconut milk
- ½ cup white sugar
- 1 tsp salt
Instructions
Make the pandan layer
- Hydrate the agar-agar. In a small bowl, mix the agar-agar powder with the water and let it sit to hydrate.
- Prepare the pandan leaves. Cut the pandan leaves into short pieces.
- Blend the pandan. Blend the pandan leaves with the water until broken down and fragrant.
- Strain the juice. Strain the mixture through a fine strainer or cheesecloth, pressing well to extract smooth pandan juice.
- Heat the pandan juice. Pour the pandan juice into a pot over low-medium heat and bring it to a gentle simmer. Stir the soaked agar-agar once more to loosen it, then add it to the pot while stirring.
- Dissolve the agar-agar. Stir continuously until the agar-agar is fully dissolved and the liquid looks clear. Run a spoon through the mixture, if you see any graininess, keep stirring until smooth.
- Sweeten the mixture. Add the sugar and stir until completely dissolved.
- Pour and set the pandan layer. Pour the pandan layer into your mold or cups. Let it set at room temperature until just firm (about 30 minutes) before adding the coconut layer on top. Meanwhile, prepare the coconut layer.
Make the coconut layer
- Hydrate the agar-agar. In a bowl, mix the agar-agar with the water (the same way as before) and let it sit.
- Heat the coconut milk. Heat the coconut milk in a pot over low heat. When it gently bubbles around the edges, add the agar-agar mixture and stir until fully dissolved and smooth.
- Season the coconut layer. Add the sugar and salt and stir until completely dissolved, then remove from the heat.
- Layer the coconut mixture. Once the pandan layer is just set, gently spoon the coconut layer over the top. Keep the spoon close to the surface so the layers stay clean.
- Let the jelly set. Let the jelly rest at room temperature until fully set. Slice into pieces or chill before serving.
Notes
- Use the nutrition card in this recipe as a guideline.
Easy and delicious!! Loved it
Hi! What size pan would be best for this if I don’t have a mold?
Hi! A pan about 15–20 cm (6–8 inches) works well. You can also use a plastic food container instead of a mold, that’s actually what I sometimes do!