Authentic Thai Roti Dessert Recipe
As an Amazon Associate, I earn from qualifying purchases. Read the full disclosure here .
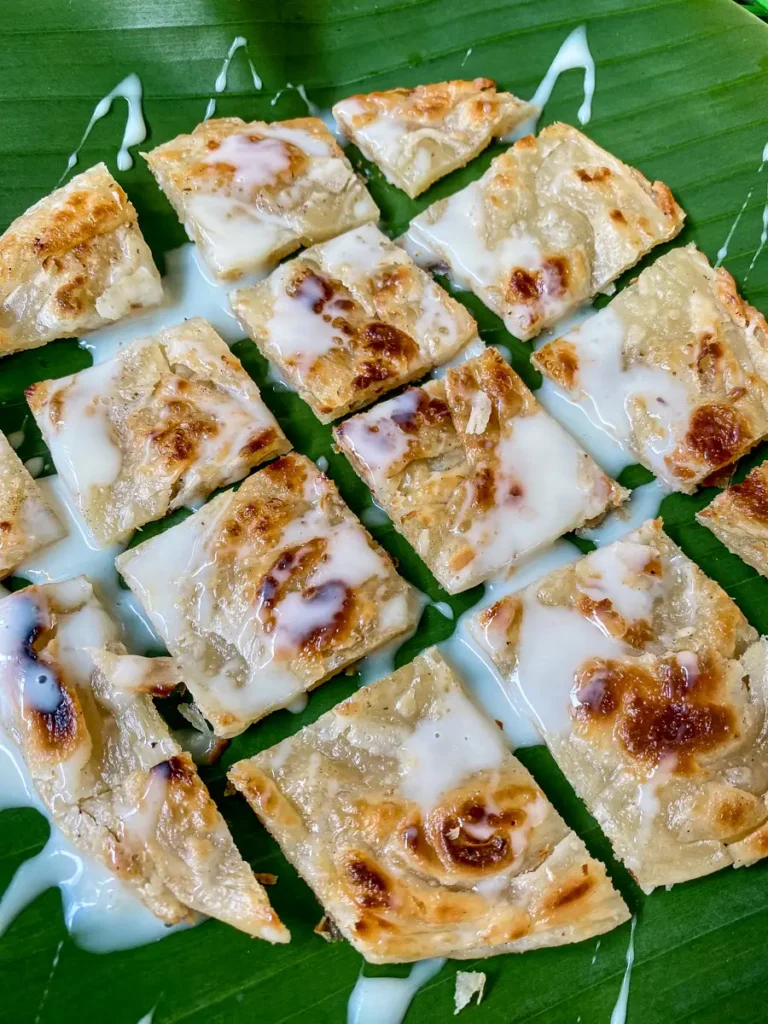
This is my go-to authentic Thai roti dessert recipe, and it makes the crispiest Thai-style pancakes you’ll ever try. We’re using the traditional method with homemade dough, pan-fried until golden and crunchy, then finished with condensed milk.

If you’re ever at a Thai street market, don’t miss your chance to try this delicious dessert or a tray of these coconut pancakes fresh off the pan!
Thai roti bread is a sweet Thai dessert made from thin, stretchy dough that’s pan-fried until golden and crispy. It’s often topped with sweetened condensed milk and sugar, and is a popular street food known for its flaky and crisp texture.
The basics of making Thai pancake
This recipe teaches you how to make the traditional no-filling version of Thai roti dessert. While street vendors often add banana, egg, or chocolate, starting with the plain dough is the best way to learn the technique and nail the texture at home.
The goal is a crispy outside and a soft, slightly chewy center.
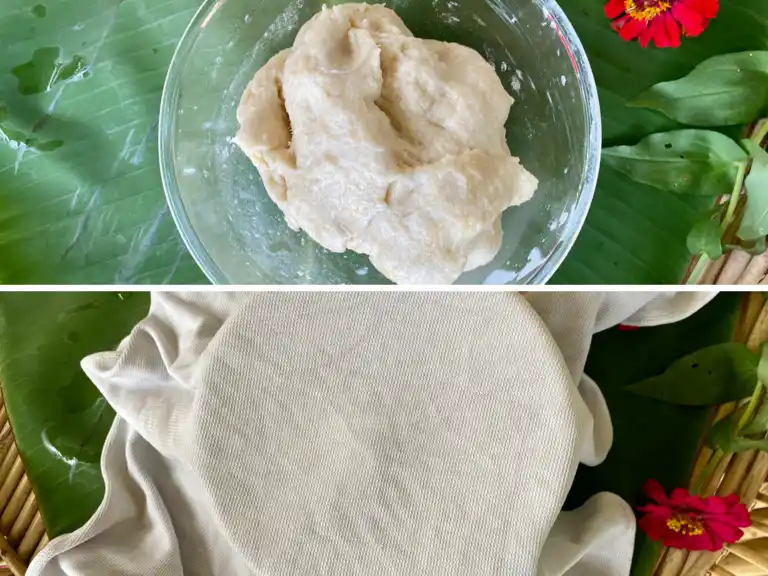
It all starts with a simple dough made from flour, egg, water, oil, and salt. After kneading, the dough rests, and then gets shaped into small balls and coated in melted butter.

The buttery layer gives the crispy roti its signature golden finish and flaky bite. After a second rest, each dough ball is gently stretched into a thin sheet, ready for the pan.
No need to flip or toss it like the vendors in Southern Thailand, just press it out as thin as you can and cook until golden and crisp.

I made these with my niece, and they turned out great. Honestly, they’re pretty foolproof!
Learn Thai cooking step by step
My cookbook is a combination of authentic Thai recipes and Western dishes cooked with Thai flavors and ingredients. It’s a great starting point if you’re new to Thai cooking or want to cook it more often.
Ingredient notes and substitutes
Keep scrolling for step-by-step photos and all my best tips, or jump straight to the recipe card if you’re ready to start cooking without helpful images.

- All-purpose flour – Gives the roti dough structure without affecting flavor. If you love working with flour-based recipes, also try these sweet potato balls!
- Lukewarm water – Add gradually while mixing to help the dough come together smoothly.
- Salt
- Oil – Use a neutral oil like vegetable or sunflower oil.
- Egg – Helps bind the dough and gives it a golden finish when cooked.
- Butter – Apply generously after shaping for a flaky texture and golden crust.
- Sweetened condensed milk – Classic topping that adds sweetness after frying. Get it here.
How to make Thai roti bread
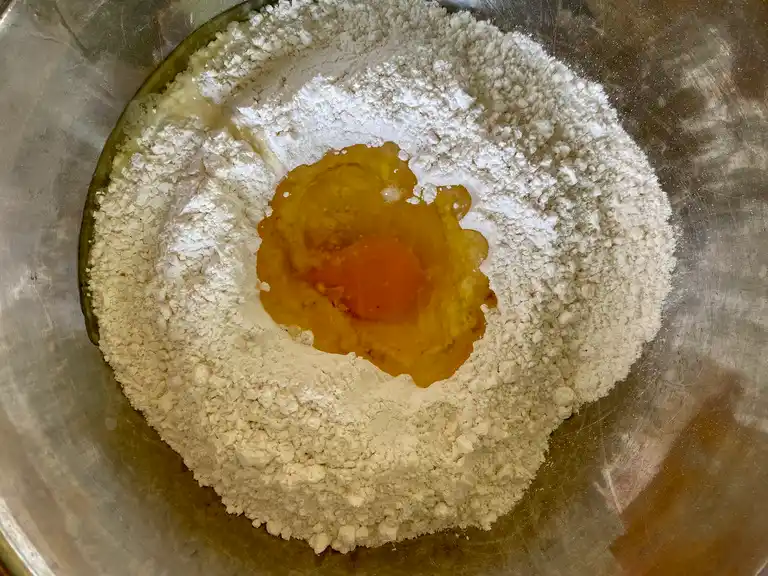
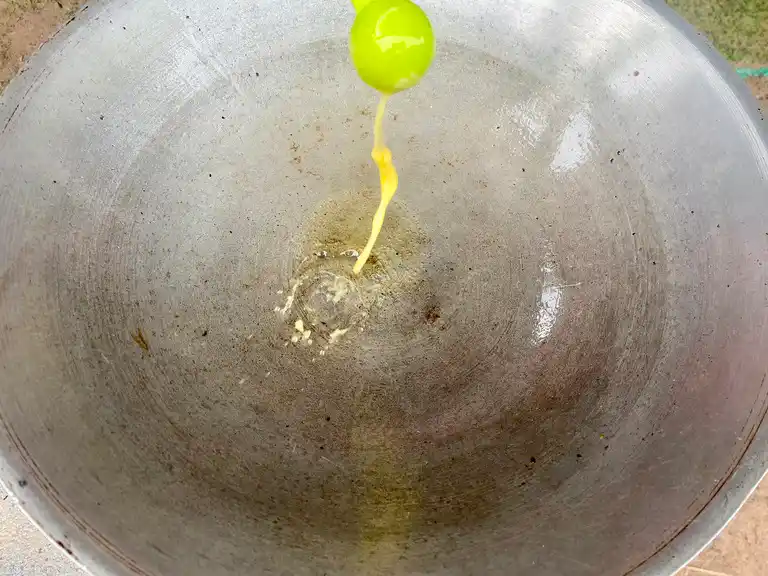
Step 1: Start by adding the flour to a large mixing bowl. Make a well in the center and add the egg, salt, and oil.
Step 2: Begin kneading with your hands while slowly pouring in the lukewarm water. Knead until the dough becomes smooth and elastic—it should bounce back slightly when pressed.
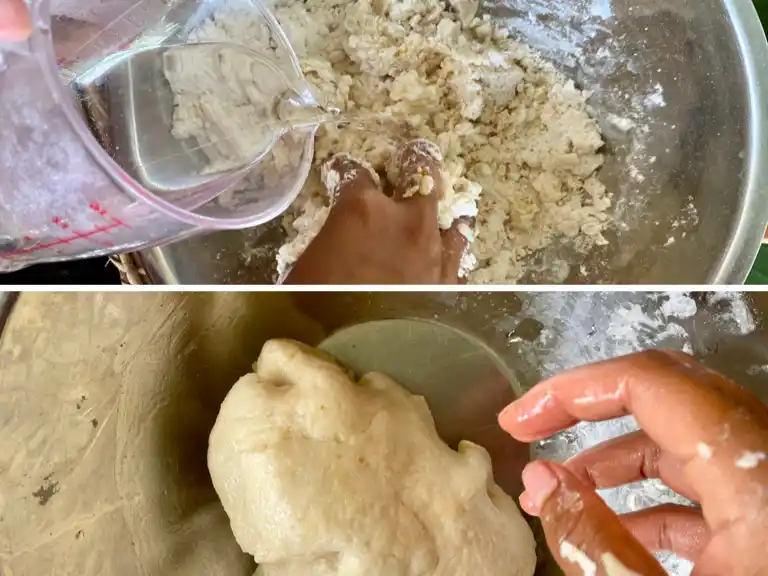
Step 3: Cover the bowl with a damp towel and let the dough rest for 1 hour. After resting, stretch and pull the dough several times using both hands to help develop the gluten.

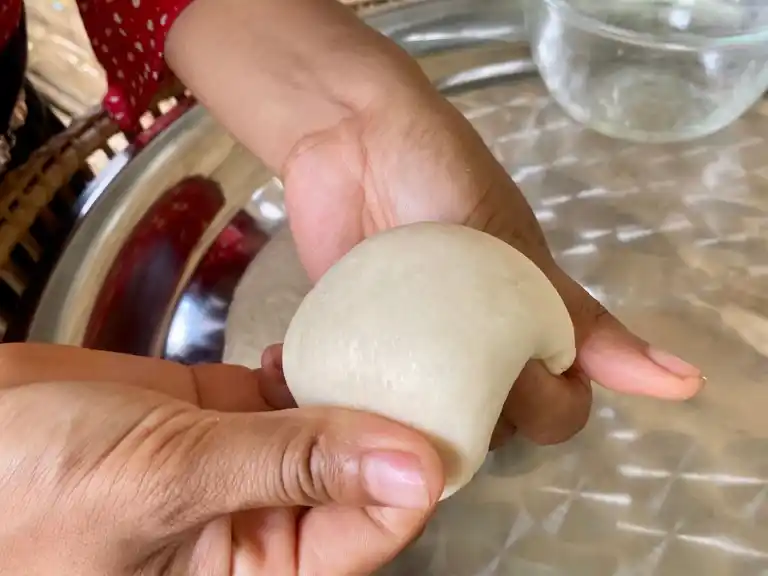
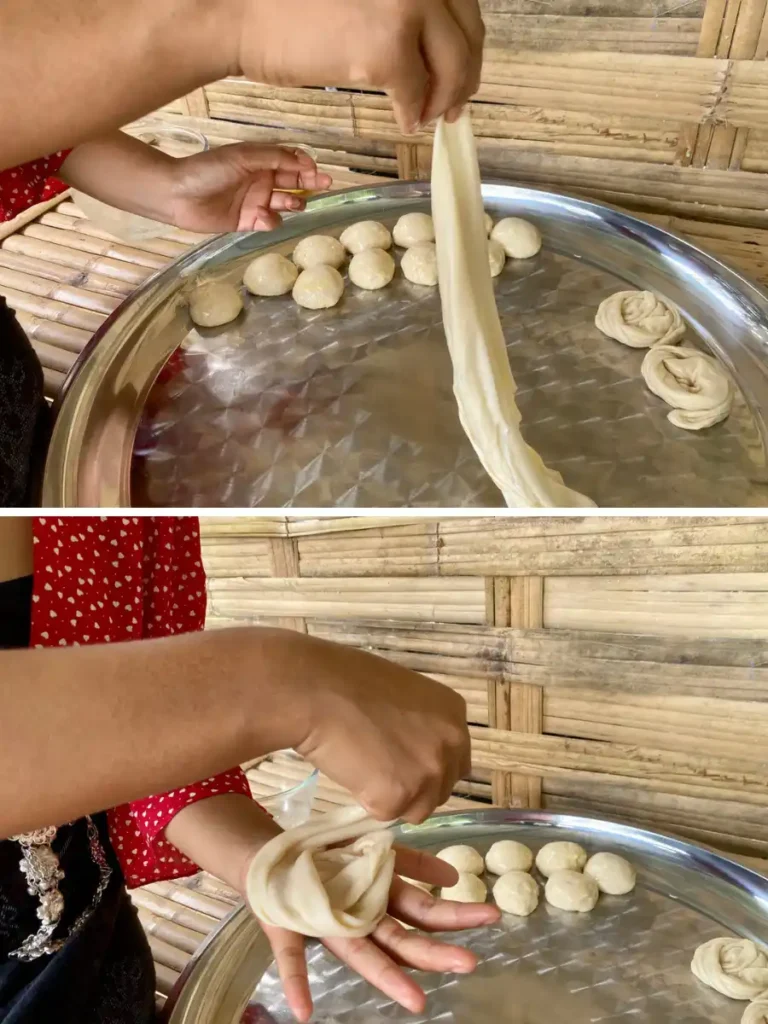
Step 4: Divide the dough into even portions (about 2.5 oz, 70 g each). Shape each piece into a ball by gently pulling the dough downward and tucking it underneath.
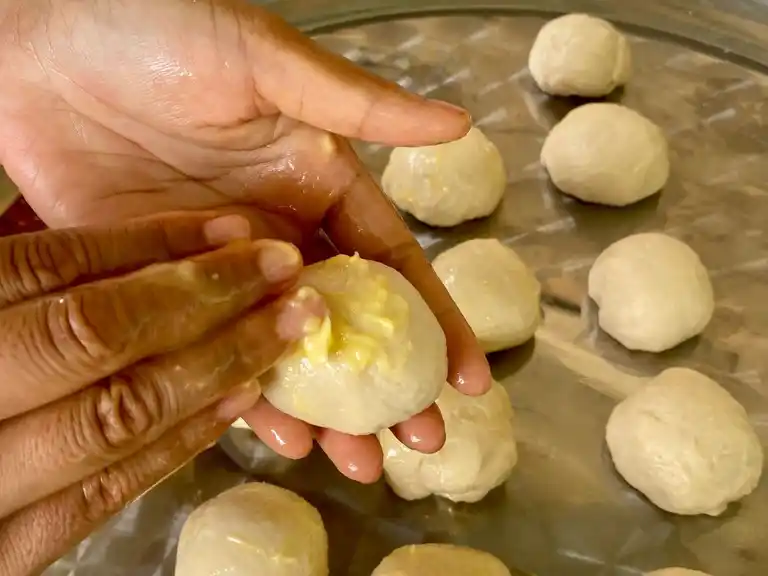
Step 5: Brush each dough ball generously with melted butter and place them in a bowl. Cover with a damp towel and let them rest for another 30 minutes.
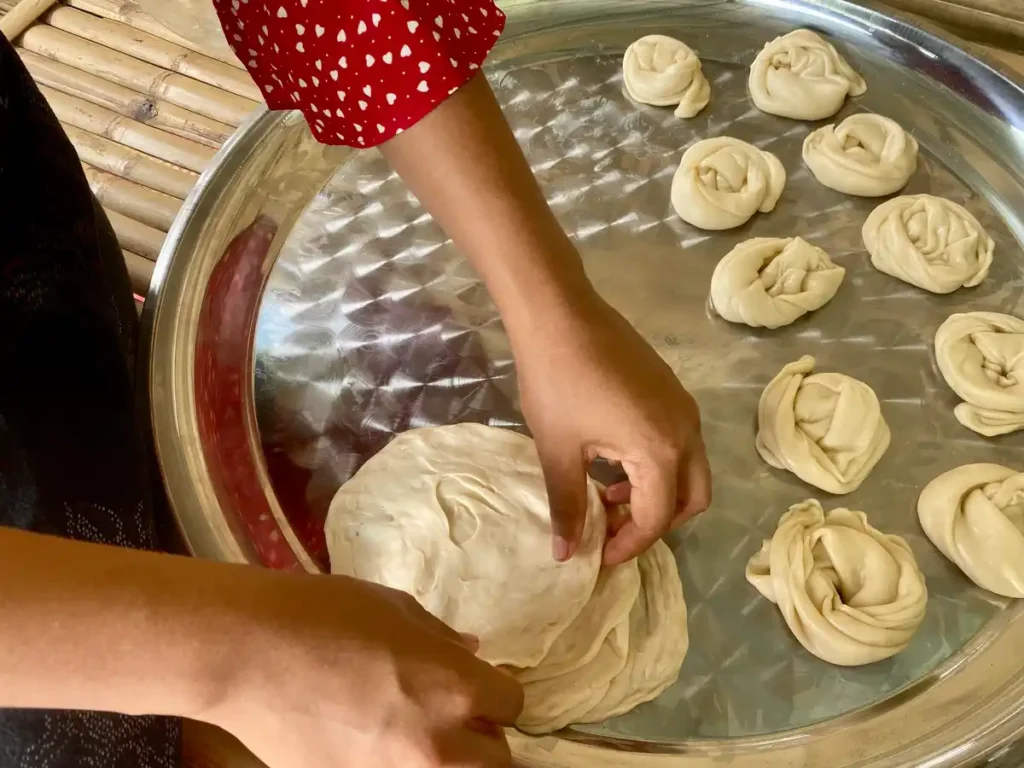
Step 6: Once rested, flatten each ball into a thin sheet using your hands. For a thinner result, gently “throw” the dough onto your work surface to stretch it further, or use a rolling pin if that’s easier.
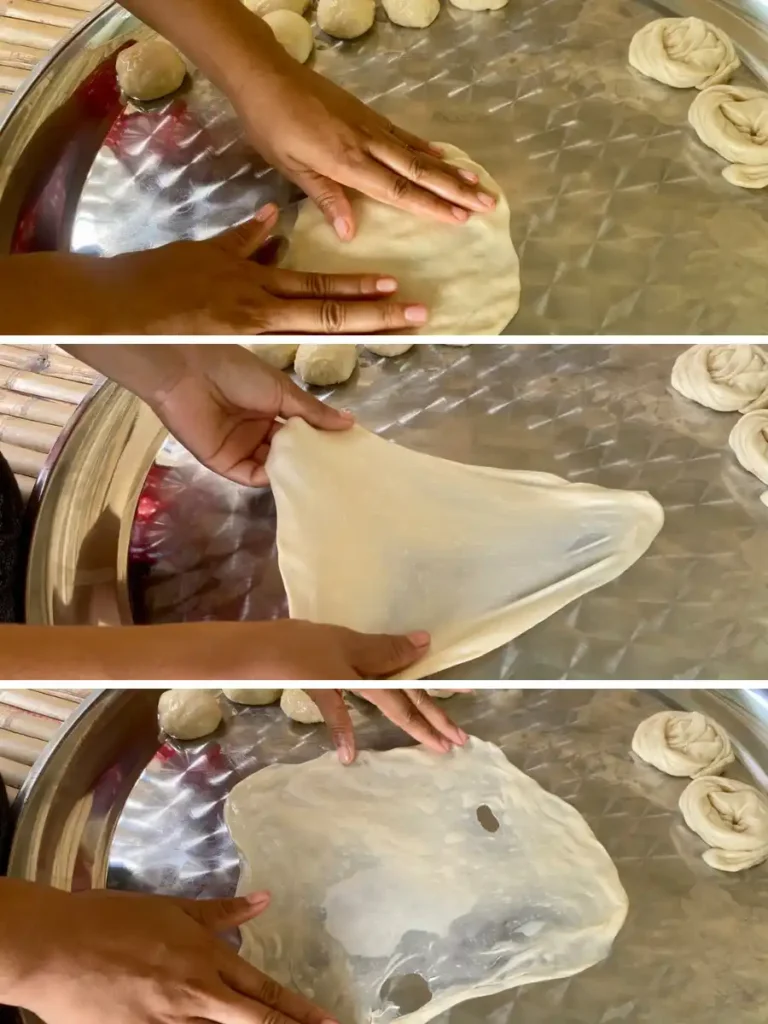
Step 7: Pick up one edge of the dough and let it stretch naturally as it falls into your other hand. Repeat for all the dough balls.
Step 8: Stretch out each dough one more time. For crispier roti, stretch the dough as thin as possible; for a softer texture, keep it slightly thicker.
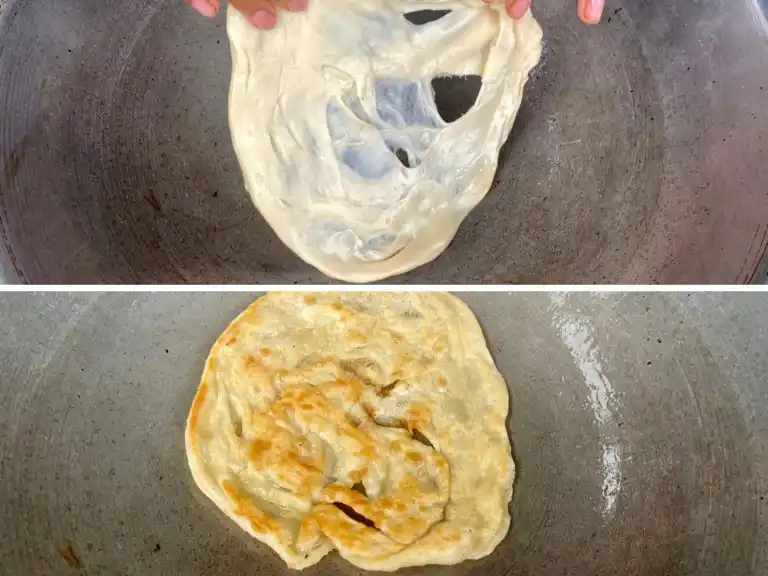
Step 9: Fry each stretched-out roti dough with 1 tablespoon of oil, and add a small amount of the remaining melted butter.
Step 10: Fry each side until golden-brown and crisp. Serve immediately and top your sweet roti with condensed milk/granulated sugar. Or add a Nutella topping, jam, ice cream, or anything you like!
Important recipe tips
- Let the dough rest exactly as instructed—this helps with texture and stretch.
- Knead the dough well until it feels smooth and elastic.
- Coat each dough ball generously with melted butter. Use a good-quality butter for the best flavor.
- Roll the dough as thin as possible if you want it extra crispy.
- Fry the roti one at a time and try not to flip it too often!
Frequently asked questions
Can I make the dough in advance?
Yes, you can prep the dough ahead of time. Just cover it and store it in the fridge for up to 2–3 days. When you’re ready, roll it out and fry. You can also pre-cook the rotis and reheat them in a pan to bring back the crispiness.
How to store them?
Once cooled to room temperature, store the cooked roti in an airtight container in the fridge for up to 5 days. Reheat in a dry non-stick pan until warm and crispy again.
Are they gluten-free?
No, traditional Thai roti is not gluten-free because it’s made with all-purpose wheat flour.
More Thai dessert recipes you’ll love
That’s everything you need to know before trying this authentic Thai roti dessert recipe! Use the step-by-step photos above to guide you, and don’t forget to follow me on social media: Facebook, Instagram, and Pinterest.
Authentic Thai Roti Dessert Recipe

Equipment
- Large mixing bowl
- Clean flat work surface or tray , for kneading and stretching the dough
- Damp kitchen towel or plastic wrap , to cover the dough while resting
- Rolling Pin , optional for easier stretching
- Non-stick pan
- Spatula or tongs
Ingredients
- 1 lb or 3 1/2 cups all purpose flour
- 1 tsp salt
- 5 tbsp oil
- 1 egg
- just under 1 cup water
- 2 tbsp butter
- 3 tbsp sweetened condensed milk, add to taste
Instructions
- Add flour to a large mixing bowl. Make a well in the center and add egg, salt, and oil.
- Gradually pour in lukewarm water while kneading the dough by hand. Knead until smooth and elastic—it should bounce back slightly when pressed.
- Cover the dough with a damp towel and let rest for 1 hour. After resting, stretch and pull the dough several times with both hands.
- Divide the dough into equal portions (about 2.5 oz, 70 g each). Shape into balls by pulling the dough downward and tucking it underneath.
- Brush each dough ball generously with melted butter. Place them in a bowl, cover with a damp towel, and let rest for 30 minutes.
- Flatten each ball into a thin sheet using your hands or a rolling pin. You can also stretch it by gently “throwing” it onto a flat surface.
- Lift one edge of the dough and let it stretch naturally into your other hand. Repeat for each dough ball.
- Stretch each dough sheet again—very thin for a crispy texture, or slightly thicker for a softer result.
- Fry each dough sheet in a pan with 1 tablespoon of oil and a little melted butter.
- Cook until golden brown and crispy on both sides. Serve immediately with sweetened condensed milk, sugar, or your favorite topping.
Notes
- Use the nutrition card in this recipe as a guideline.
- I added lots of step-by-step images in the post to guide you. They’re super helpful, especially if it’s your first time making this!
I am so excited to try this at our Thai night get together tonight. Is the oil measurement for what goes in the dough, or does it include the oil for frying in the amount?
Hey Emily! The 5 tablespoons of oil are for in the dough indeed! The oil for frying each roti is a separate tablespoon for each. I hope this info is still in time for your get-together. Have fun!
Remind me of my vacations in Thai !!! Going to follow the recipe and make some for my family!!