Crispy Pork Belly Air Fryer Recipe
As an Amazon Associate, I earn from qualifying purchases. Read the full disclosure here .
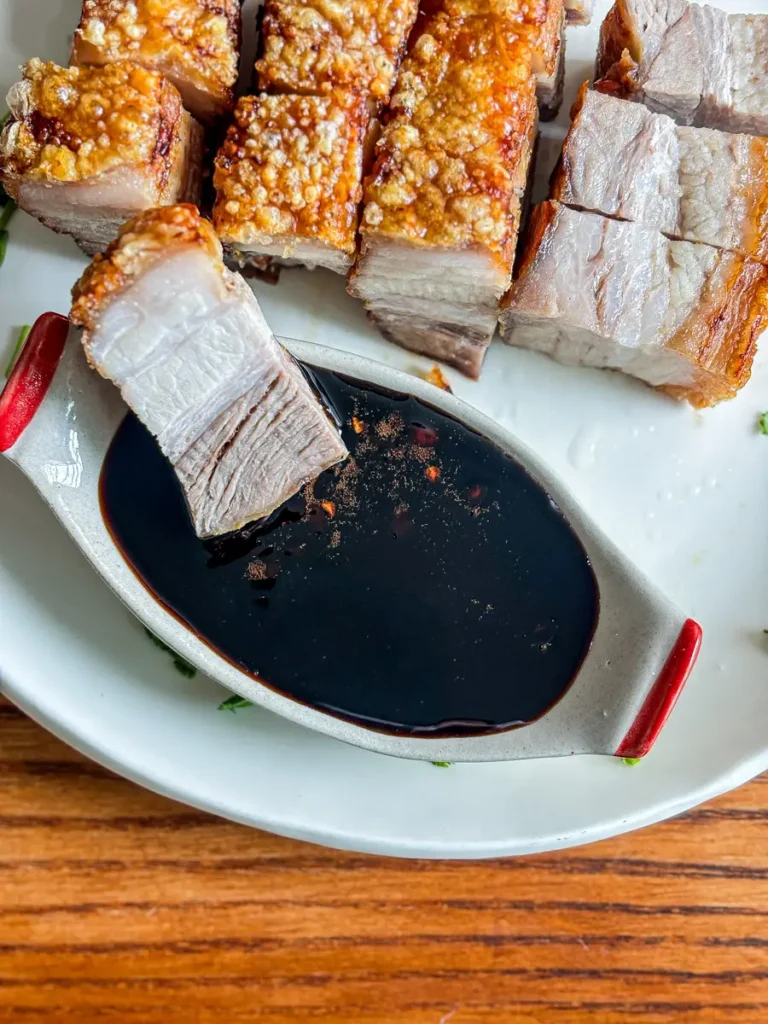
In this crispy pork belly air fryer recipe, I’ll show you the easiest, most foolproof method that needs just 3 ingredients. The pork turns out so juicy with perfectly crispy skin, and is best served sliced with a tasty dipping sauce.

Recipe highlights
- Foolproof air fryer method, no mess.
- Just 3 ingredients.
- Crispy skin that lasts for hours.
- Perfect with rice or served with dipping sauces.
The best air fryer crispy pork belly
I recently started experimenting with making crispy pork belly in the air fryer, and I have to say, it’s so much easier and quicker than frying pork belly, which is the method I was taught while working in Thai restaurants.
The skin comes out just as crackly, and the best part is you’re not left with a messy kitchen. It’s also not greasy and, of course, a bit healthier.
This recipe takes a little over an hour, and the pork belly remains crispy for several hours after cooking, which makes it perfect for snacking.
You also don’t need a long list of ingredients like some other recipes. All you need is pork belly, salt to season it and draw out moisture, and vinegar to help the skin crisp up beautifully.
PS: If you ❤ crispy pork, you’ll also love my recipe for crispy pork rinds!
Learn Thai cooking step by step
My cookbook is a combination of authentic Thai recipes and Western dishes cooked with Thai flavors and ingredients. It’s a great starting point if you’re new to Thai cooking or want to cook it more often.

Ingredient notes & substitutes
You can grab everything you need for this recipe at your nearest Asian grocery store or market. For exact measurements, head to the recipe card below!
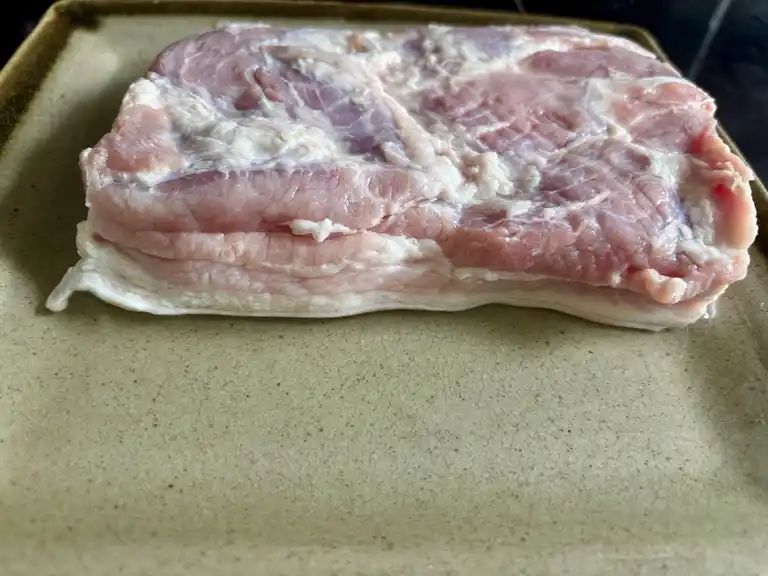
- Pork belly – Choose a slab with an even thickness and a good balance of fat and meat. Make sure it’s skin-on, since the skin is what crisps and puffs up in the air fryer. Look for smooth, firm skin and avoid cuts that are mostly fat or mostly lean.
- Vinegar – Helps break down the skin so it puffs and crisps evenly; white vinegar works best, but rice vinegar or apple cider vinegar can be used too.
- Salt – Draws out moisture from the skin to help it dry and blister in the air fryer, while also seasoning the meat.
How to make pork belly air fryer
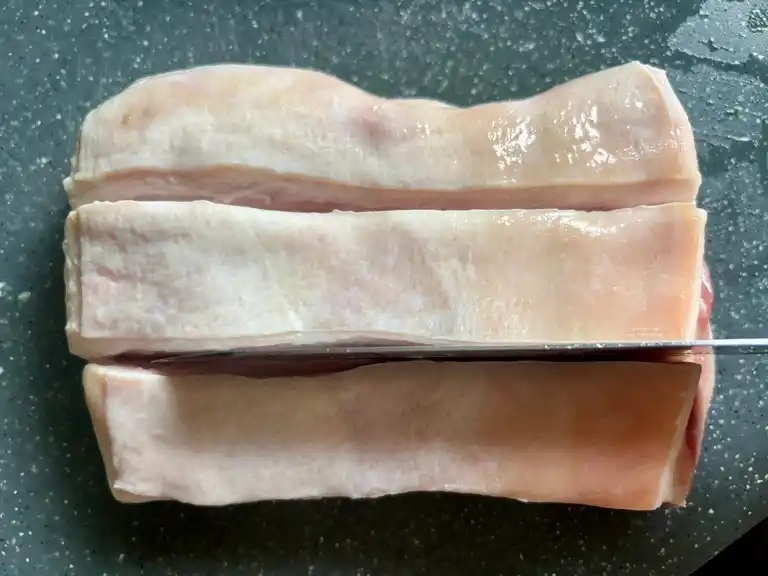
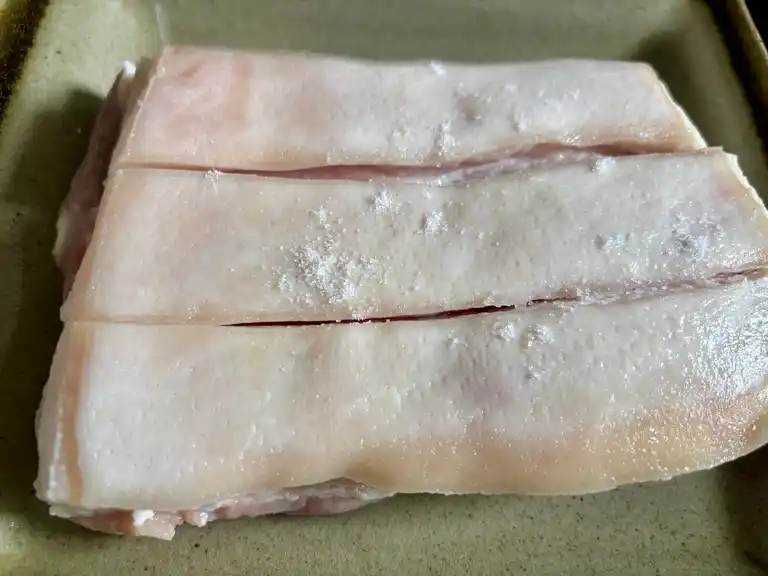
Step 1: Score the skin. Use a sharp knife to make long cuts into the pork skin, about 2–3 cm apart. This helps the salt and vinegar penetrate and ensures the skin crisps up.
Step 2: Soak with vinegar. Place the pork skin-side down in a shallow dish. Pour vinegar into the dish until the skin is fully covered. Let the pork belly soak for at least 15 minutes.
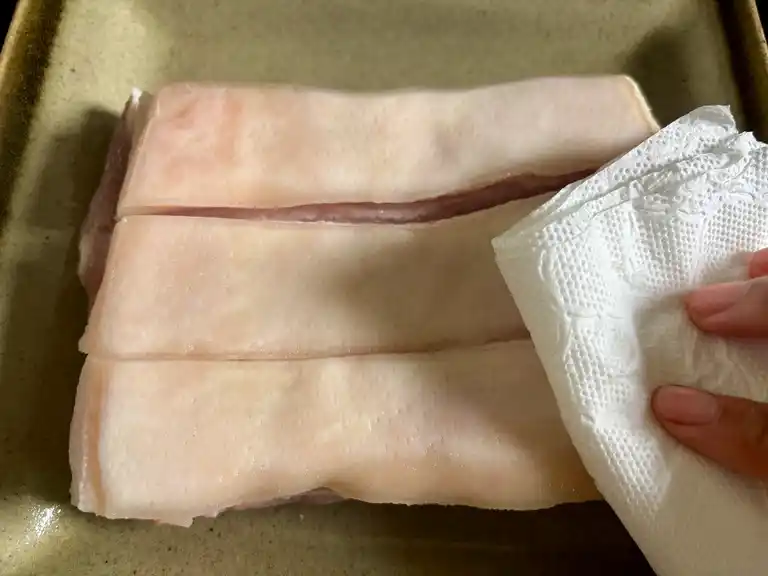
Step 3: Pat dry. After soaking, use paper towels to pat the pork belly skin completely dry. This step is crucial for getting a golden crackly crust in the air fryer.
Step 4: Season with salt. Rub the salt all over the pork belly skin. Salt draws out moisture and is key to getting that bubbly, crunchy texture.
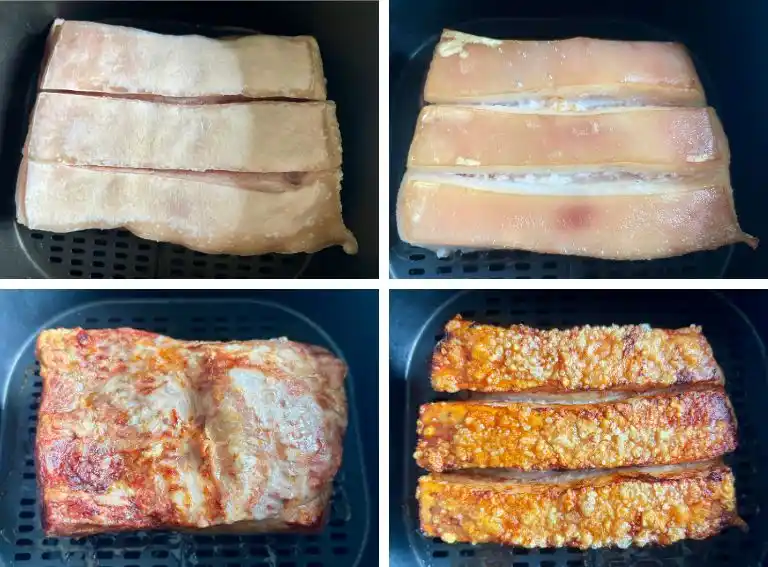
Step 5: Air fry. Preheat the air fryer to 120°C (250°F). Place the pork belly skin-side up and cook for 30 minutes. Flip skin-side down, increase the heat to 200°C (400°F), and cook for 20 minutes. Finally, flip back to skin-side up and cook for another 20 minutes, until the skin is golden and crispy. Exact cooking time may vary!
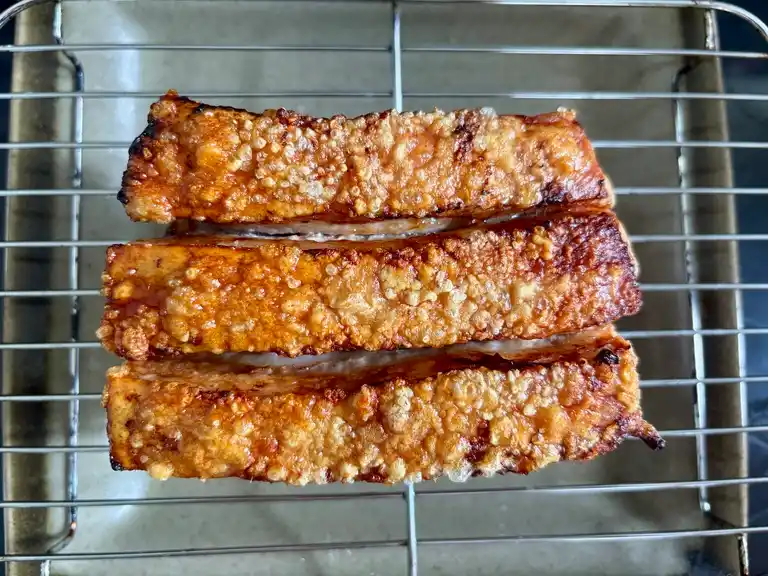
Step 6: Rest. Let the pork belly rest on a wire rack for a few minutes.
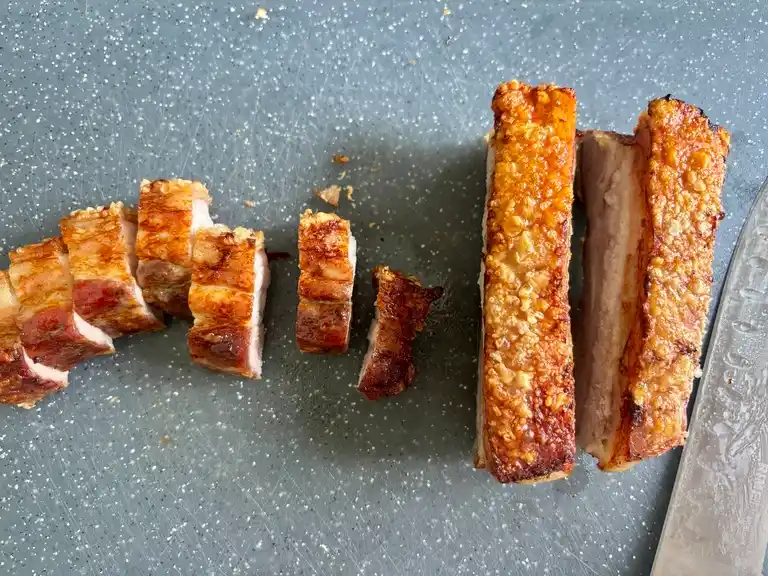
Step 7: Slice. Slice it into crispy bites. The skin should be perfectly crunchy while the inside stays tender.
How to reheat crispy pork belly in air fryer?
Reheat crispy pork belly in the air fryer at 350°F (175°C) for 3–5 minutes. This warms the meat through while re-crisping the skin. Avoid microwaving, as it makes the skin chewy.
More pork belly recipes to try
This Asian sliced pork belly air fryer recipe is the easiest way to get juicy meat and perfectly crunchy skin at home! Let me know in the comments how yours turned out, and don’t forget to follow me on Facebook, Instagram, and Pinterest!
Crispy Pork Belly Air Fryer Recipe

Equipment
- Cutting board and sharp knife
- Air fryer
- Tongs
- Paper towels to pat dry the pork skin for extra crispiness.
Ingredients
- 500 g pork belly
- 1½ tsp salt
- white vinegar, as needed to cover the pork belly skin in a shallow dish
Instructions
- Score the pork belly skin with long cuts, about 2–3 cm apart.
- Place the pork belly skin-side down in a shallow dish and pour in enough vinegar to cover the skin. Soak for about 15 minutes, then pat the skin completely dry with paper towels.
- Rub salt evenly over the skin to draw out moisture. Let it sit for a few minutes while you preheat the air fryer to 120°C (250°F).
- Cook skin-side up at 120°C (250°F) for 30 minutes. Flip skin-side down, raise the heat to 200°C (400°F) and cook for 20 minutes. Finish skin-side up for another 20 minutes, or until the skin is golden, bubbly, and crisp. Check occasionally, as exact cooking time may vary!
- Let the pork belly rest on a wire rack for 5 minutes. Slice into bite-sized pieces and serve with your favorite dipping sauce.
Notes
- Use the nutrition card in this recipe as a guideline.
I just made this today and it turned out better than I expected given how simple the recipe is. I just have a question- do you rinse the vinegar before patting dry? Thank you!
Thank you! No, definitely don’t do this. Just pat the skin dry (after soaking in vinegar) with paper towels.
❤️❤️❤️